Git Tutorial
Initial Setup
Step 1: Create a Github Account*
*one-time step
Step 2: Download Github Desktop software*
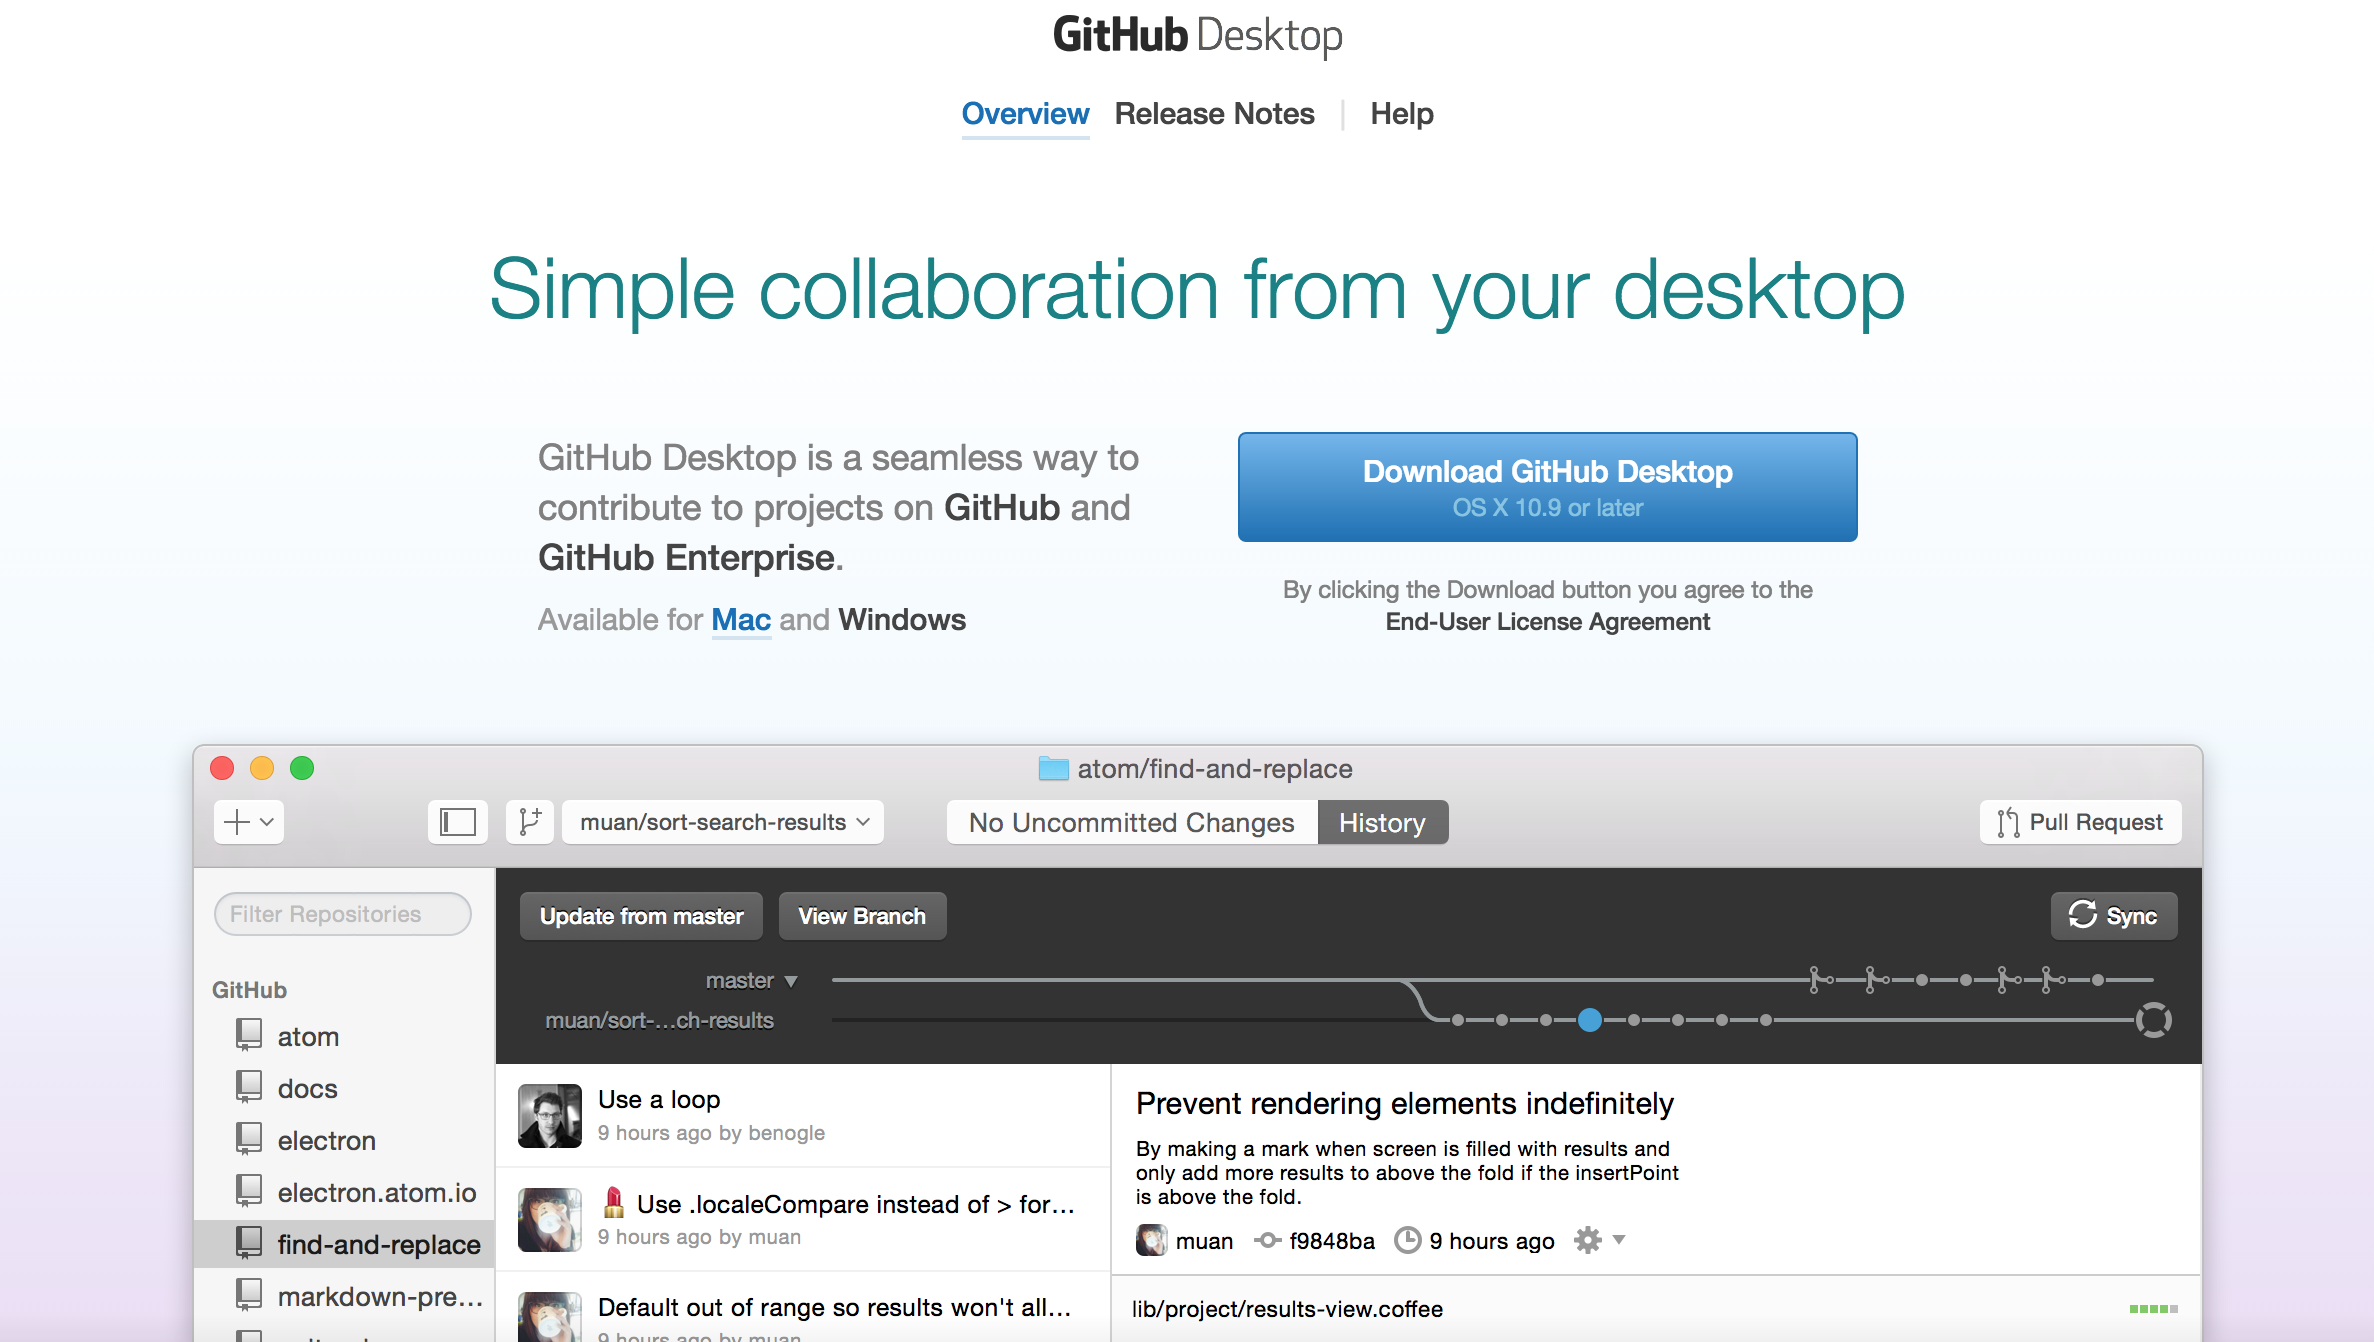
*one-time step
Step 3: Sign in to Github Account through the Github Desktop application
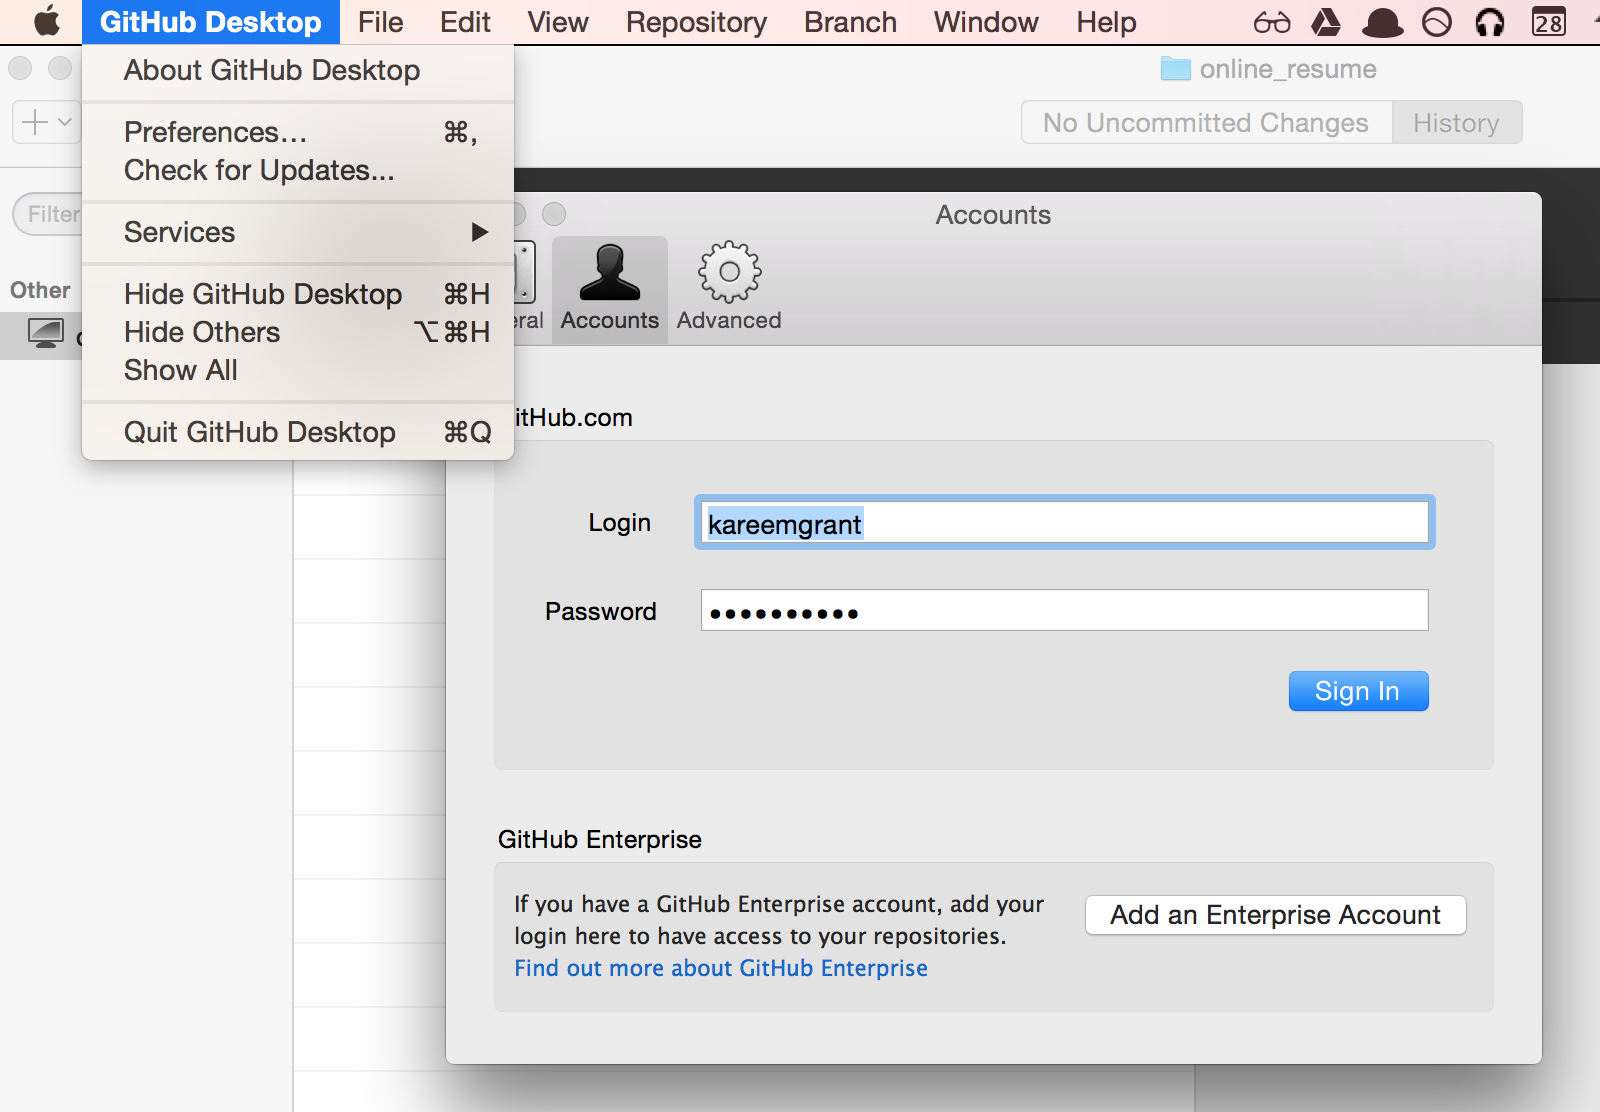
- Github Desktop -> Preferences -> Accounts
*one-time step / Use your Github account username & password
Step 4: Create a folder named github in your “class” folder*
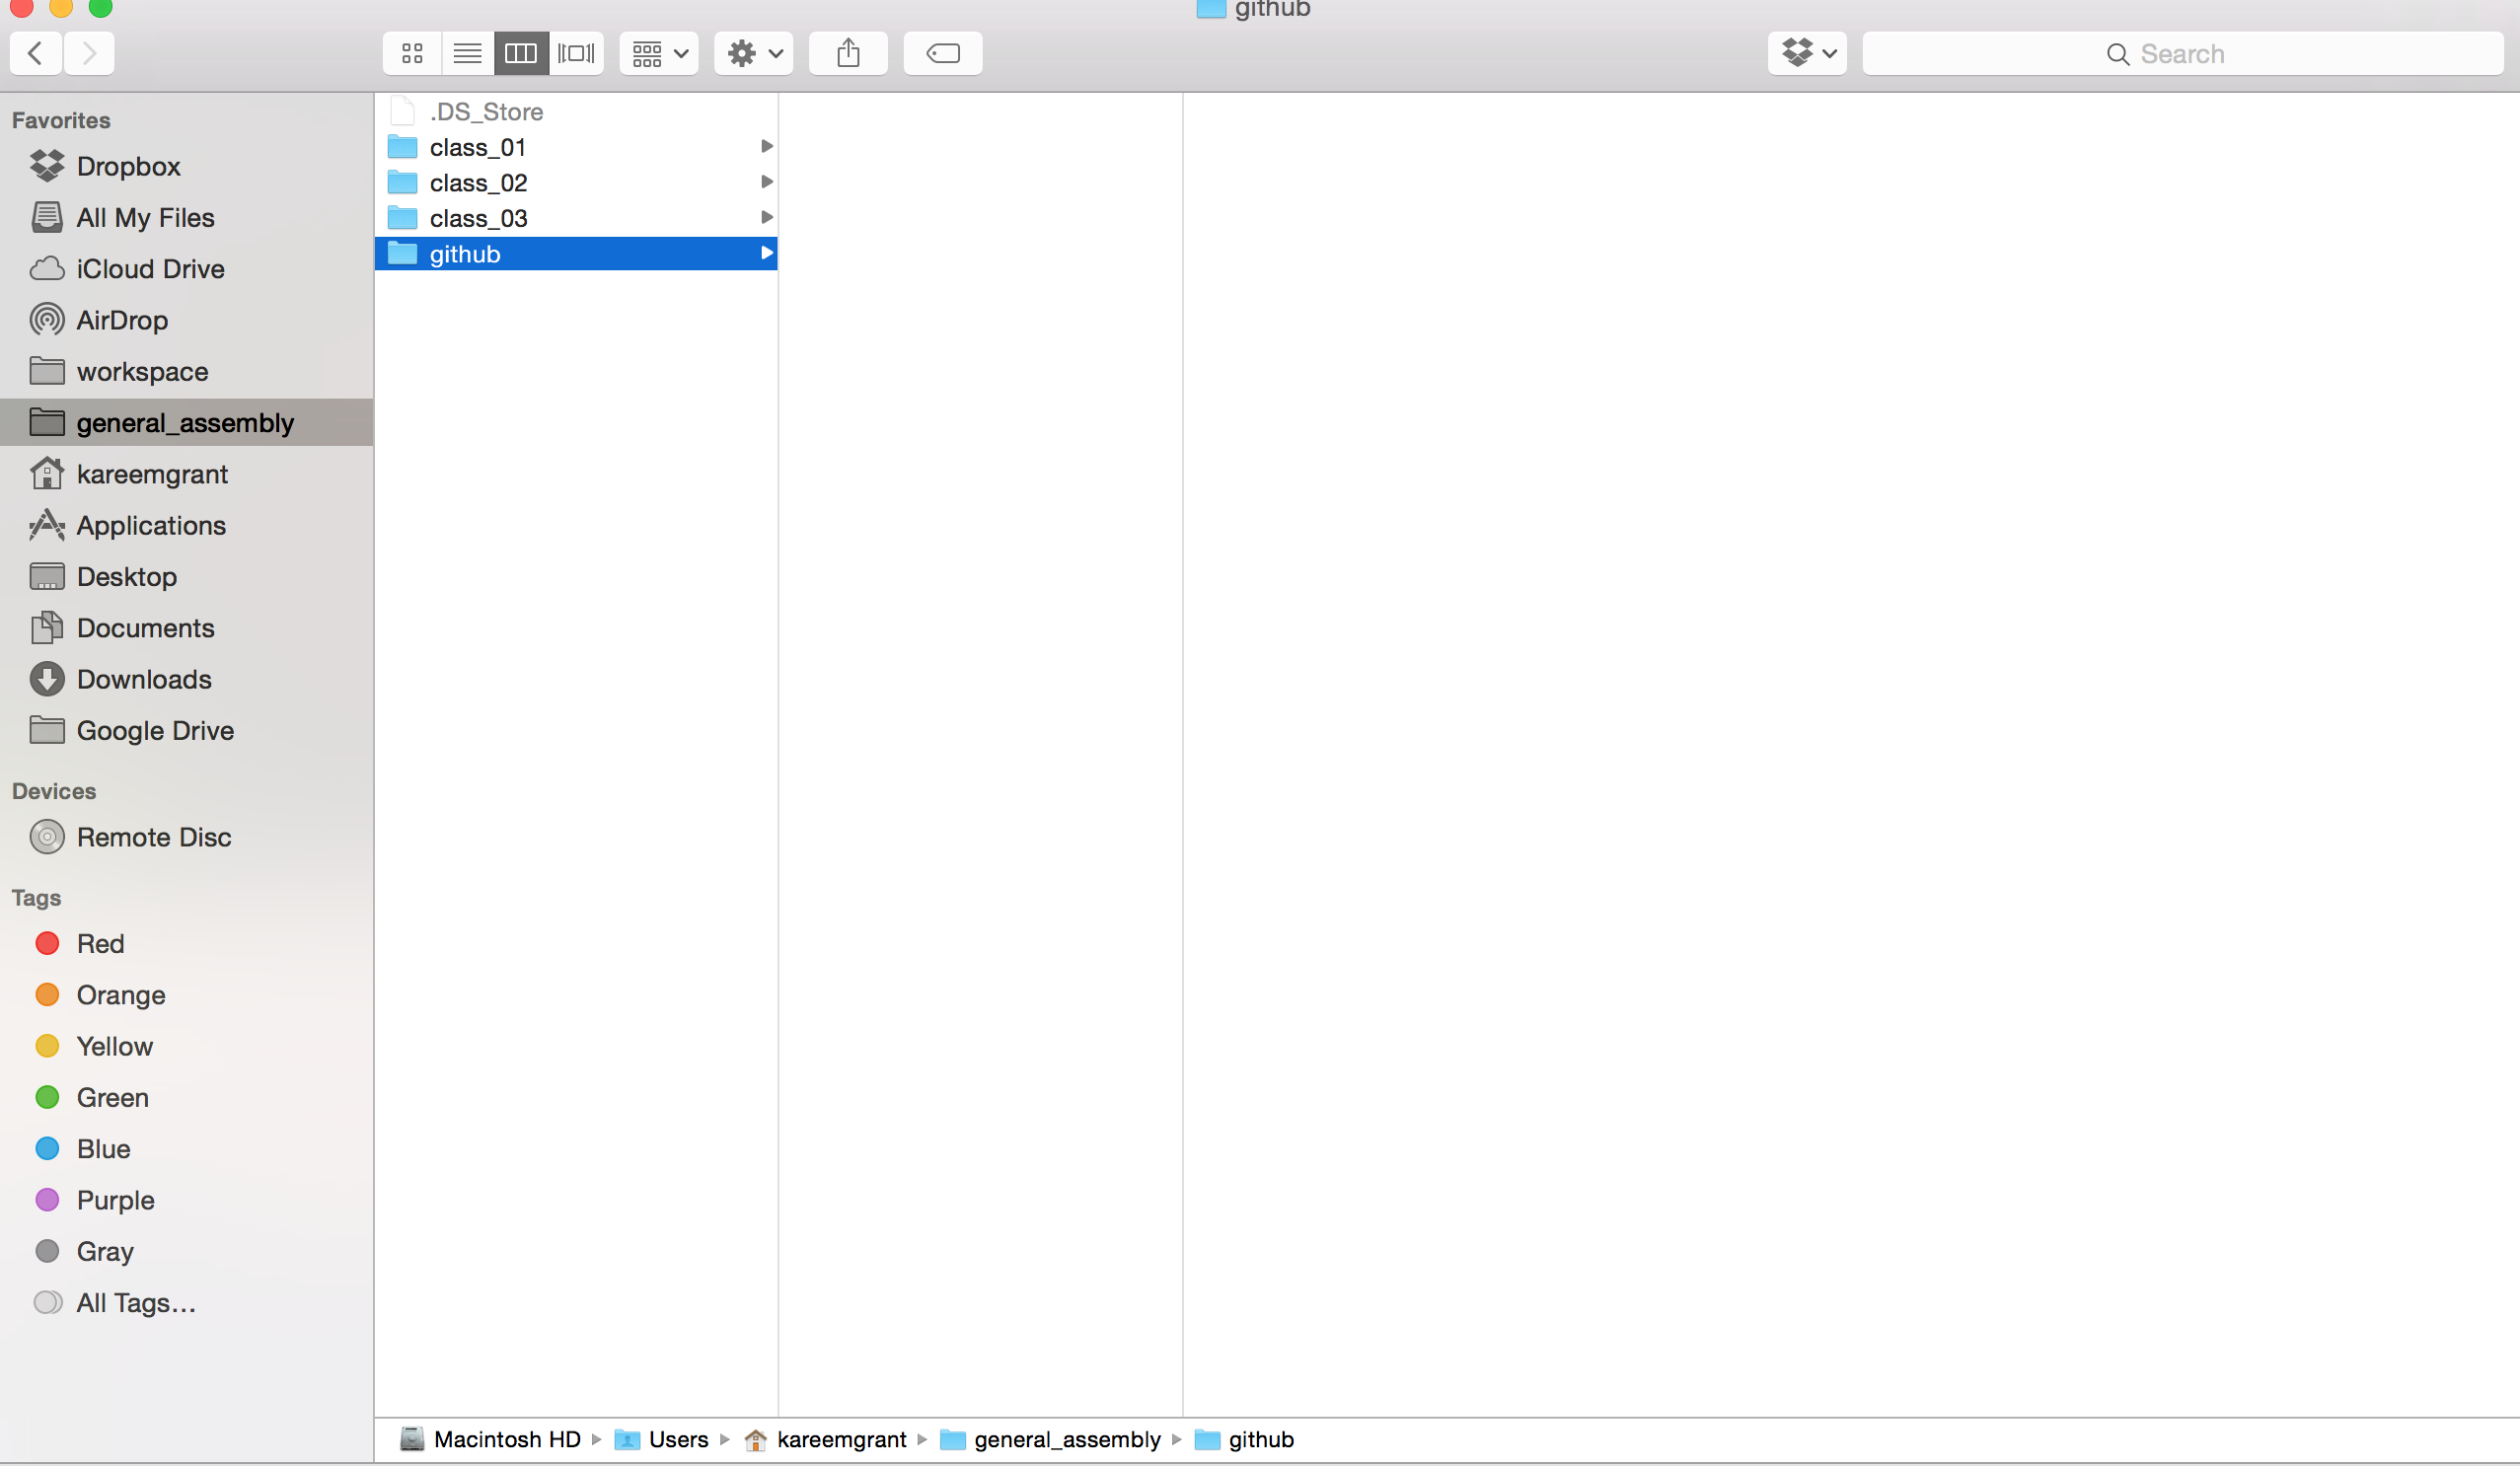
*one-time step
Starting an Assignment
Step 5a: Fork Instructor Repository
- The link for the Instructor repository will be provided to you
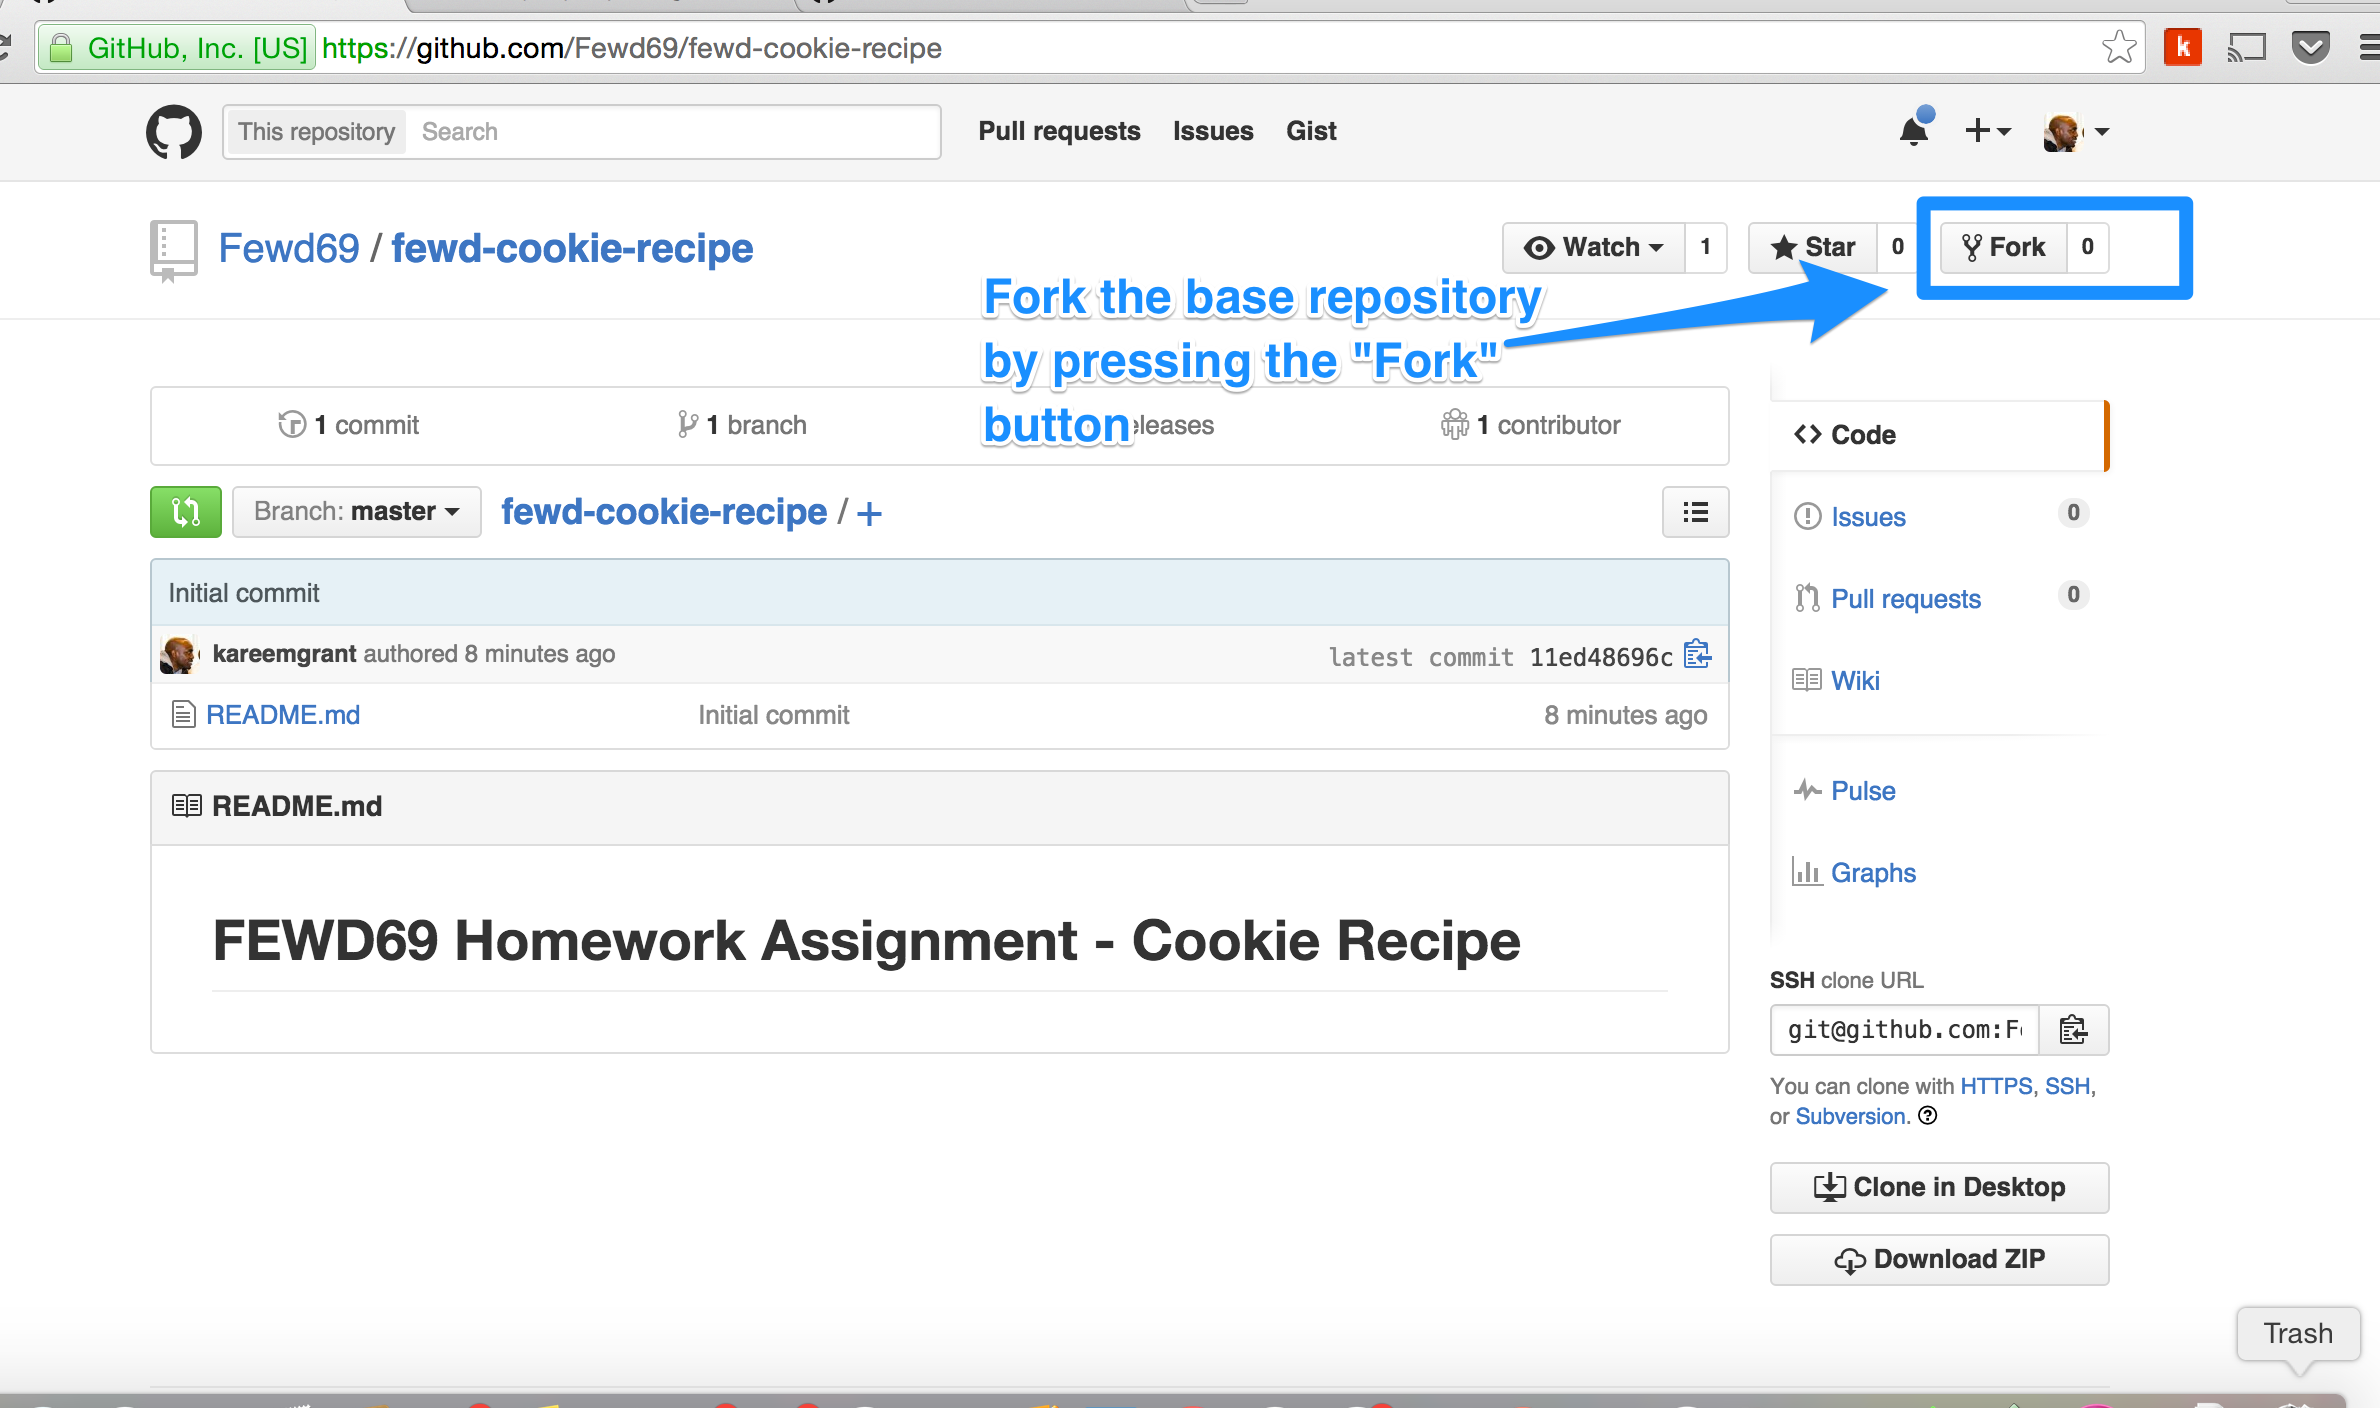
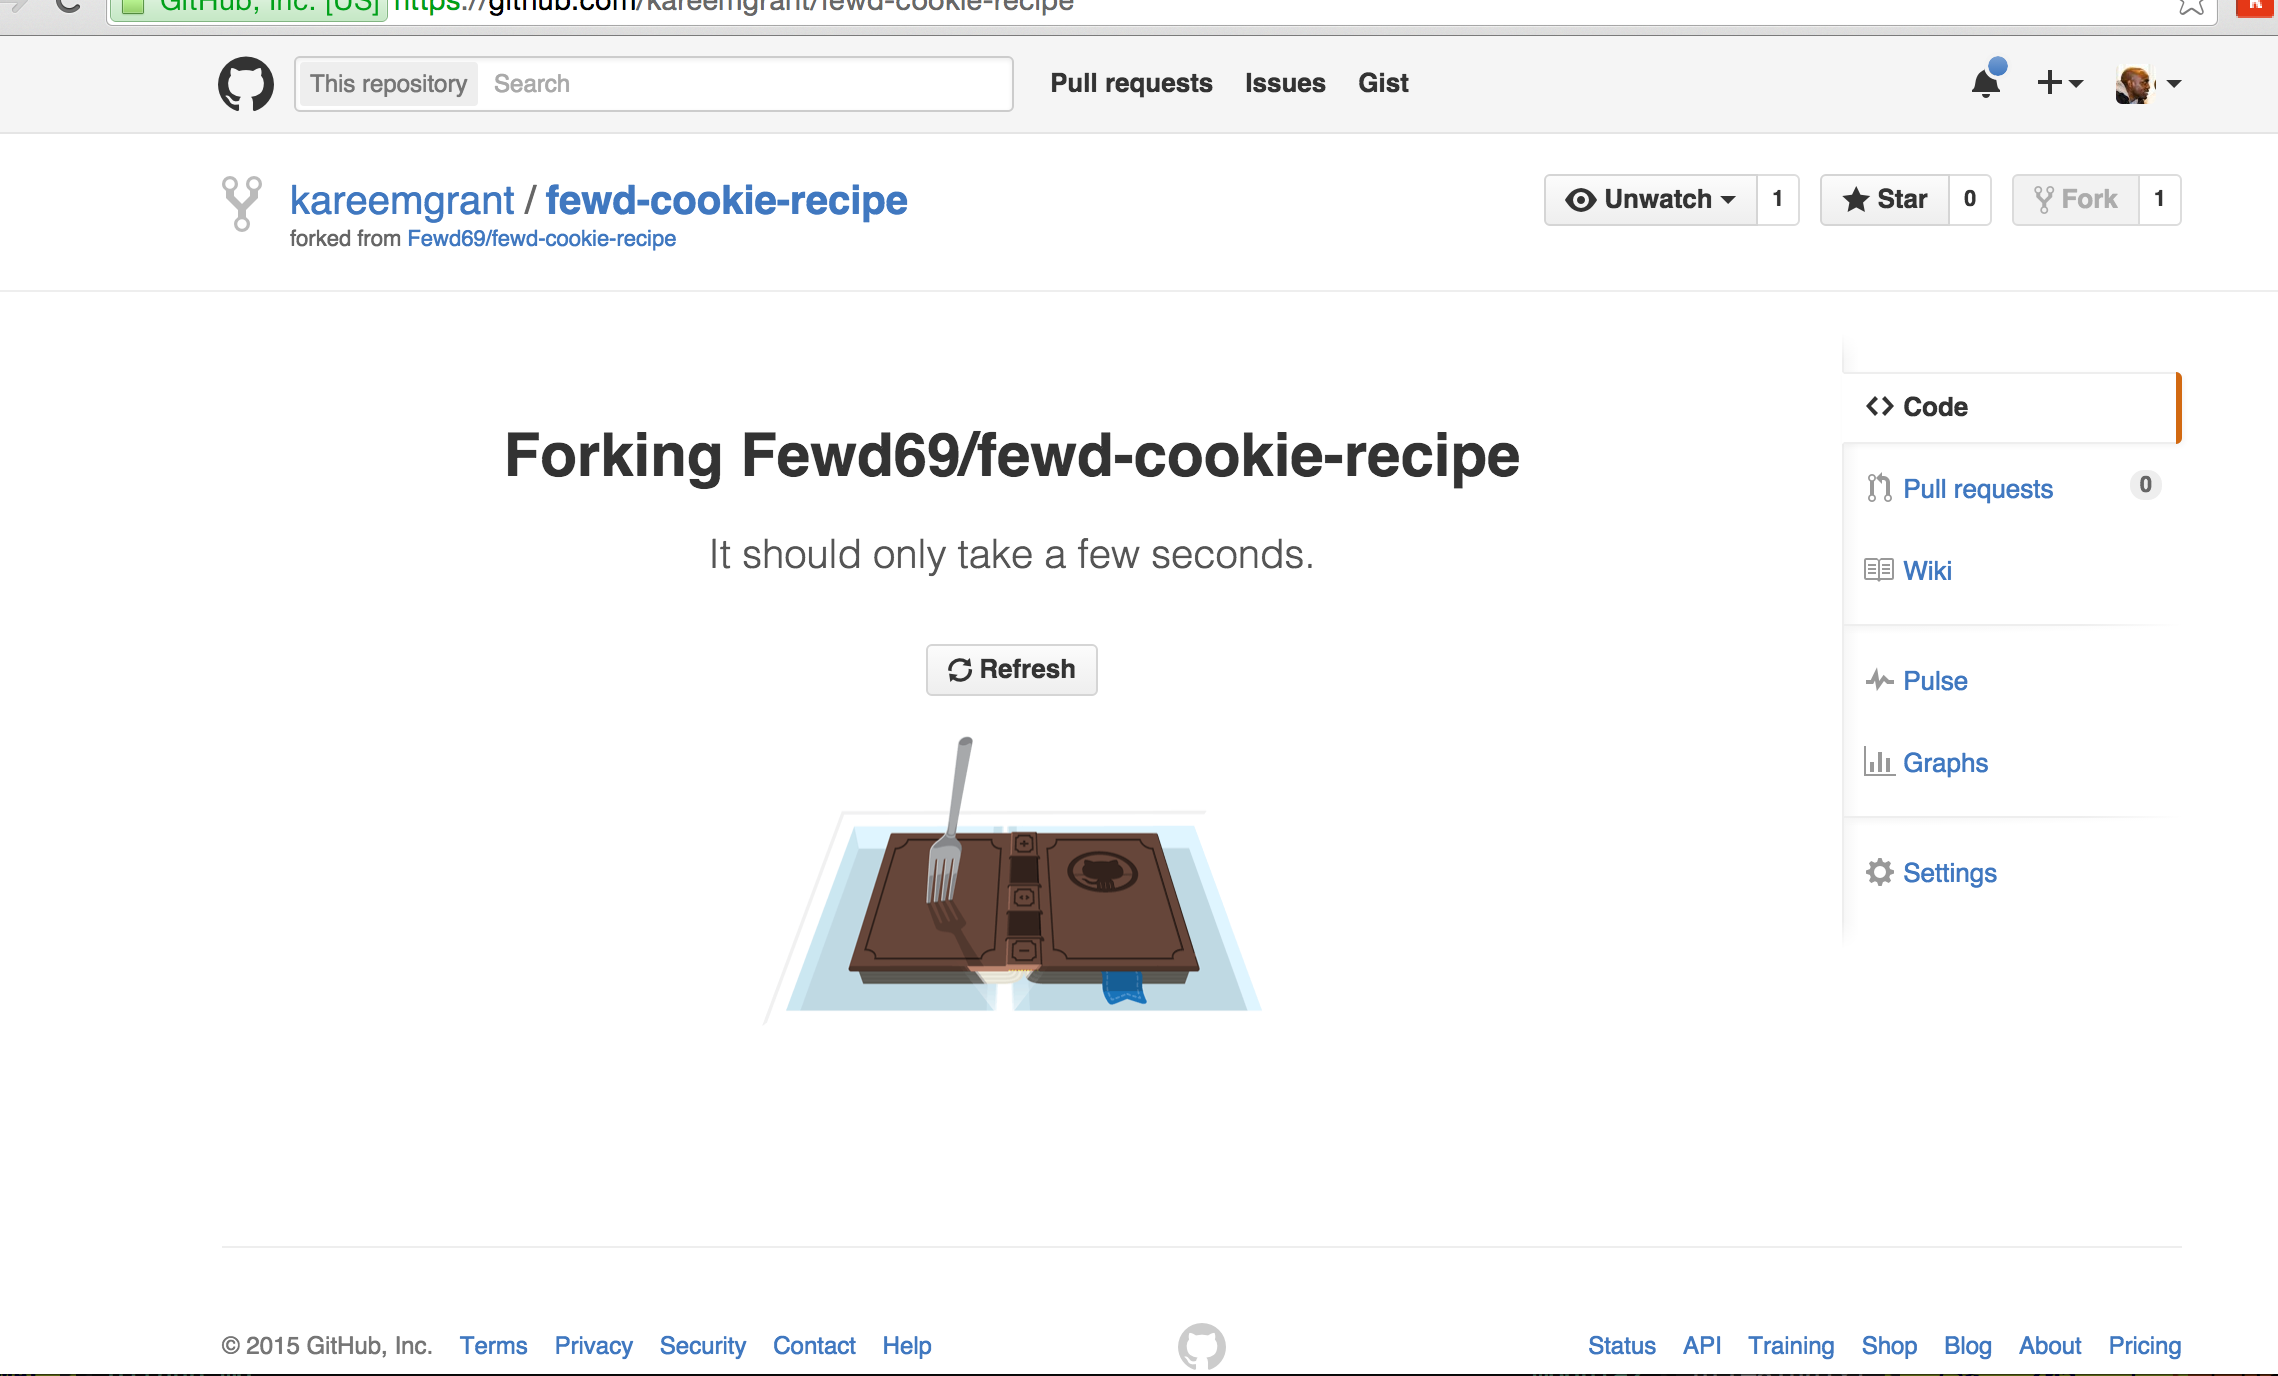
Step 5b: Fork Instructor Repository
- Github will create a copy of the repo under your account
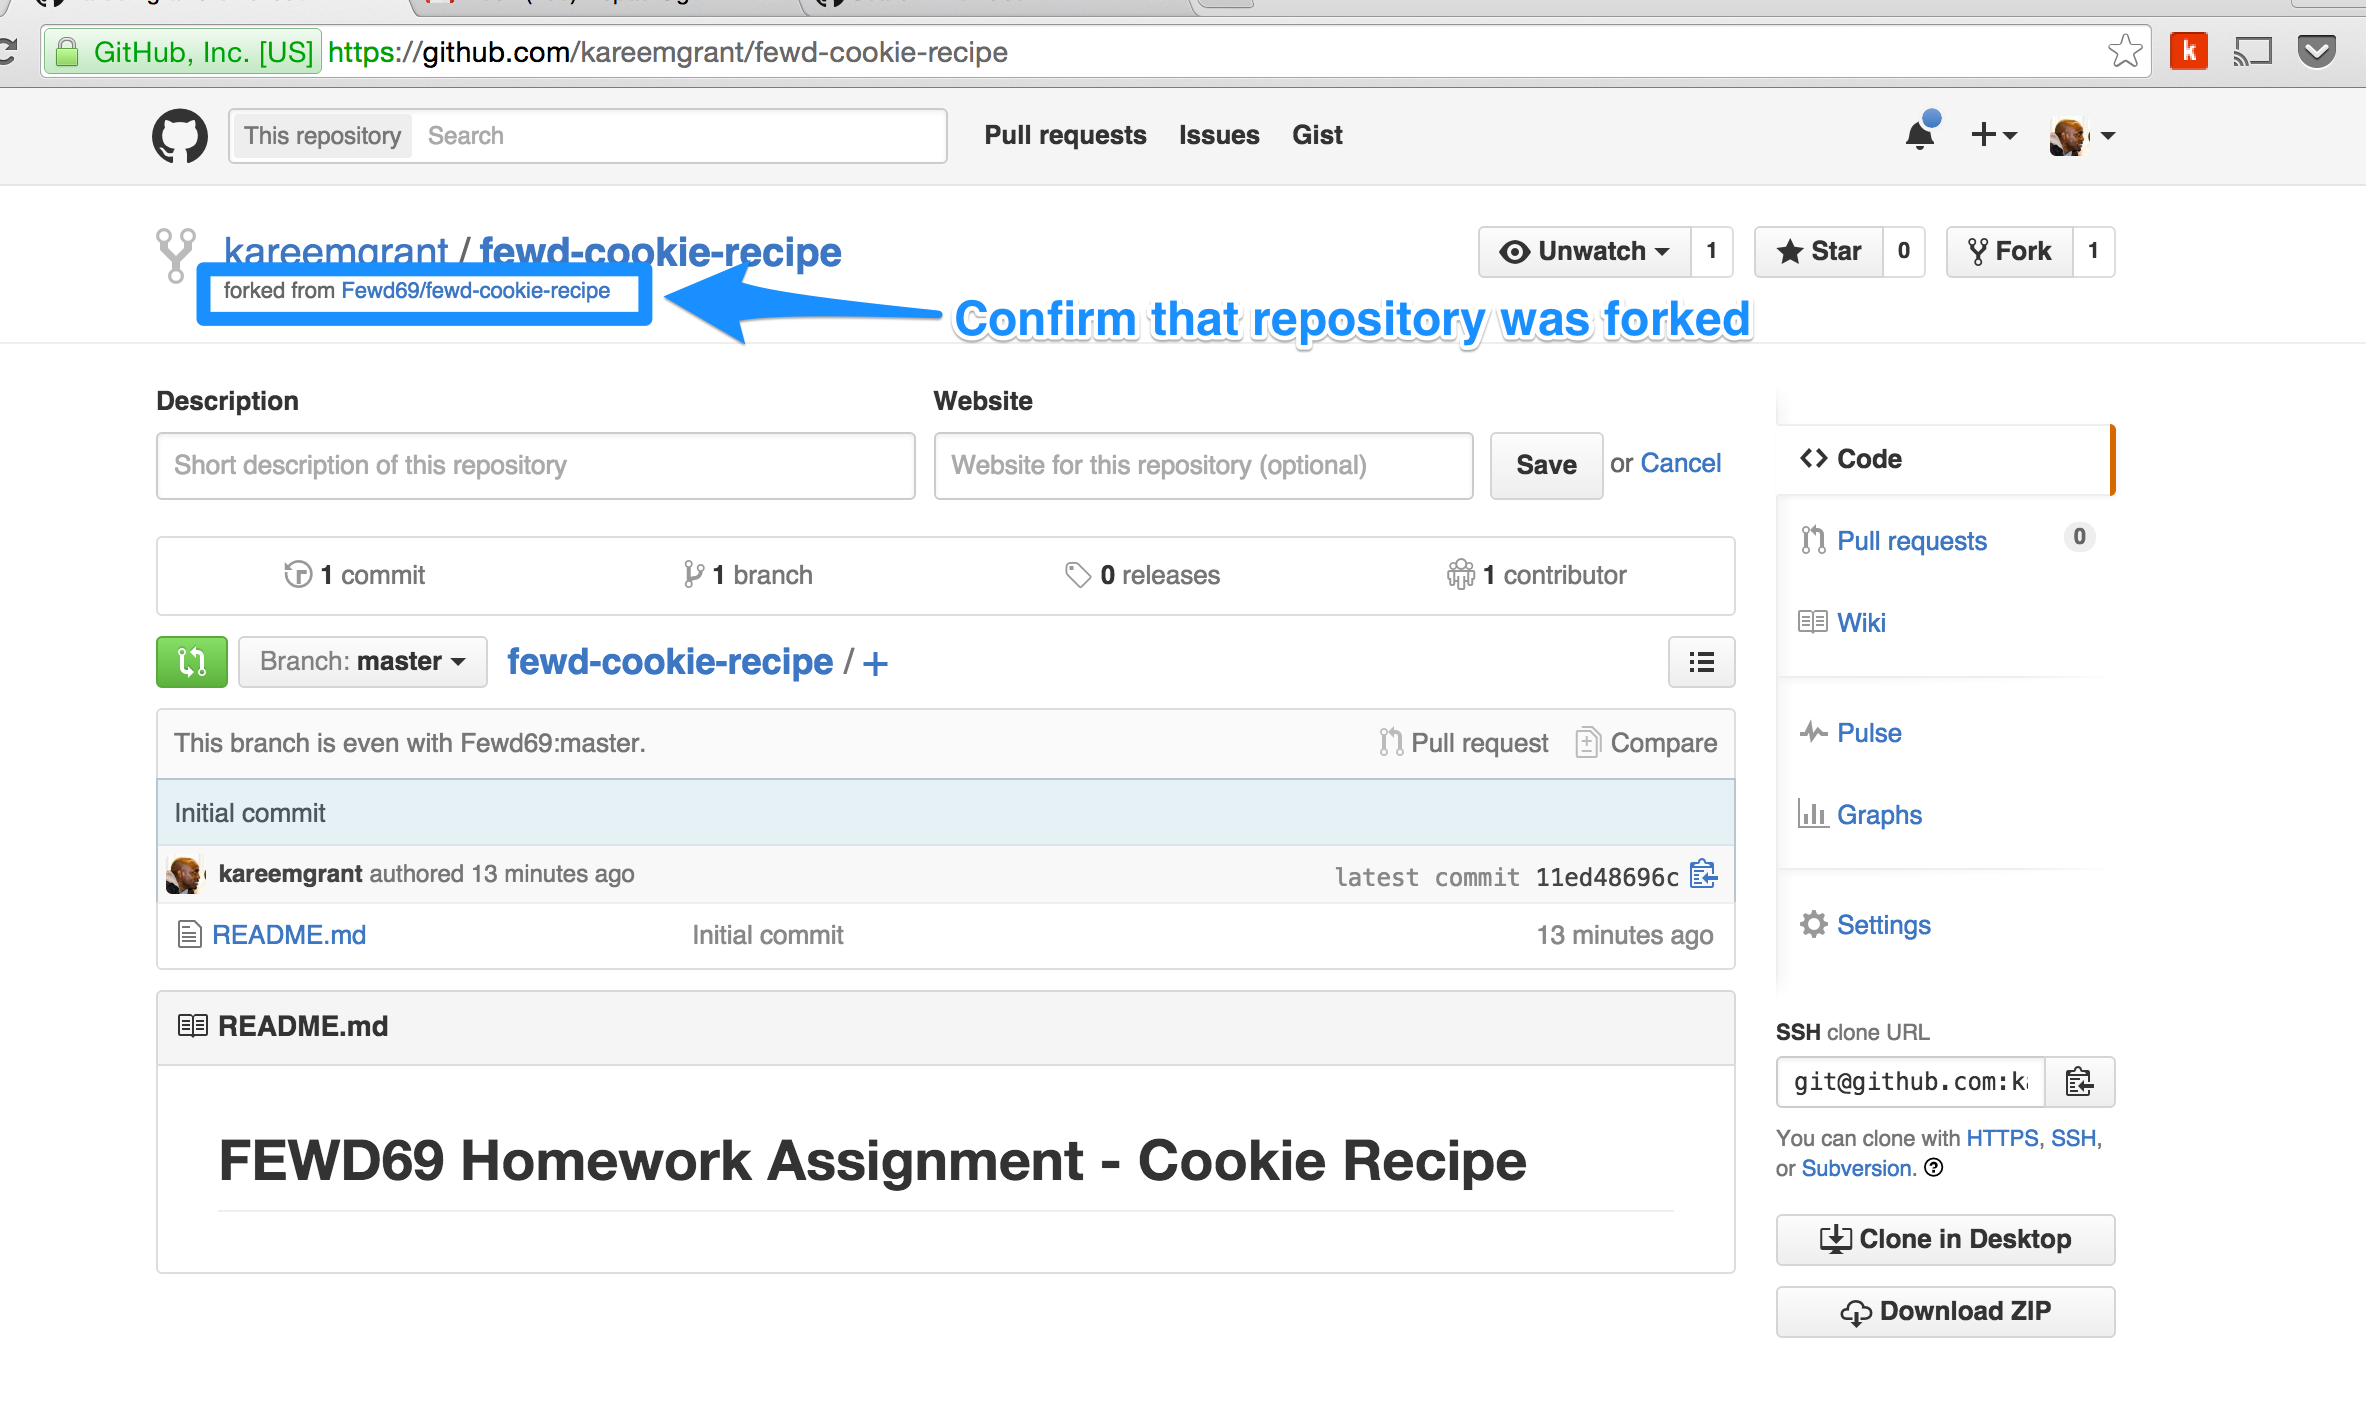
Step 6: Confirm Repository was Successfully Forked
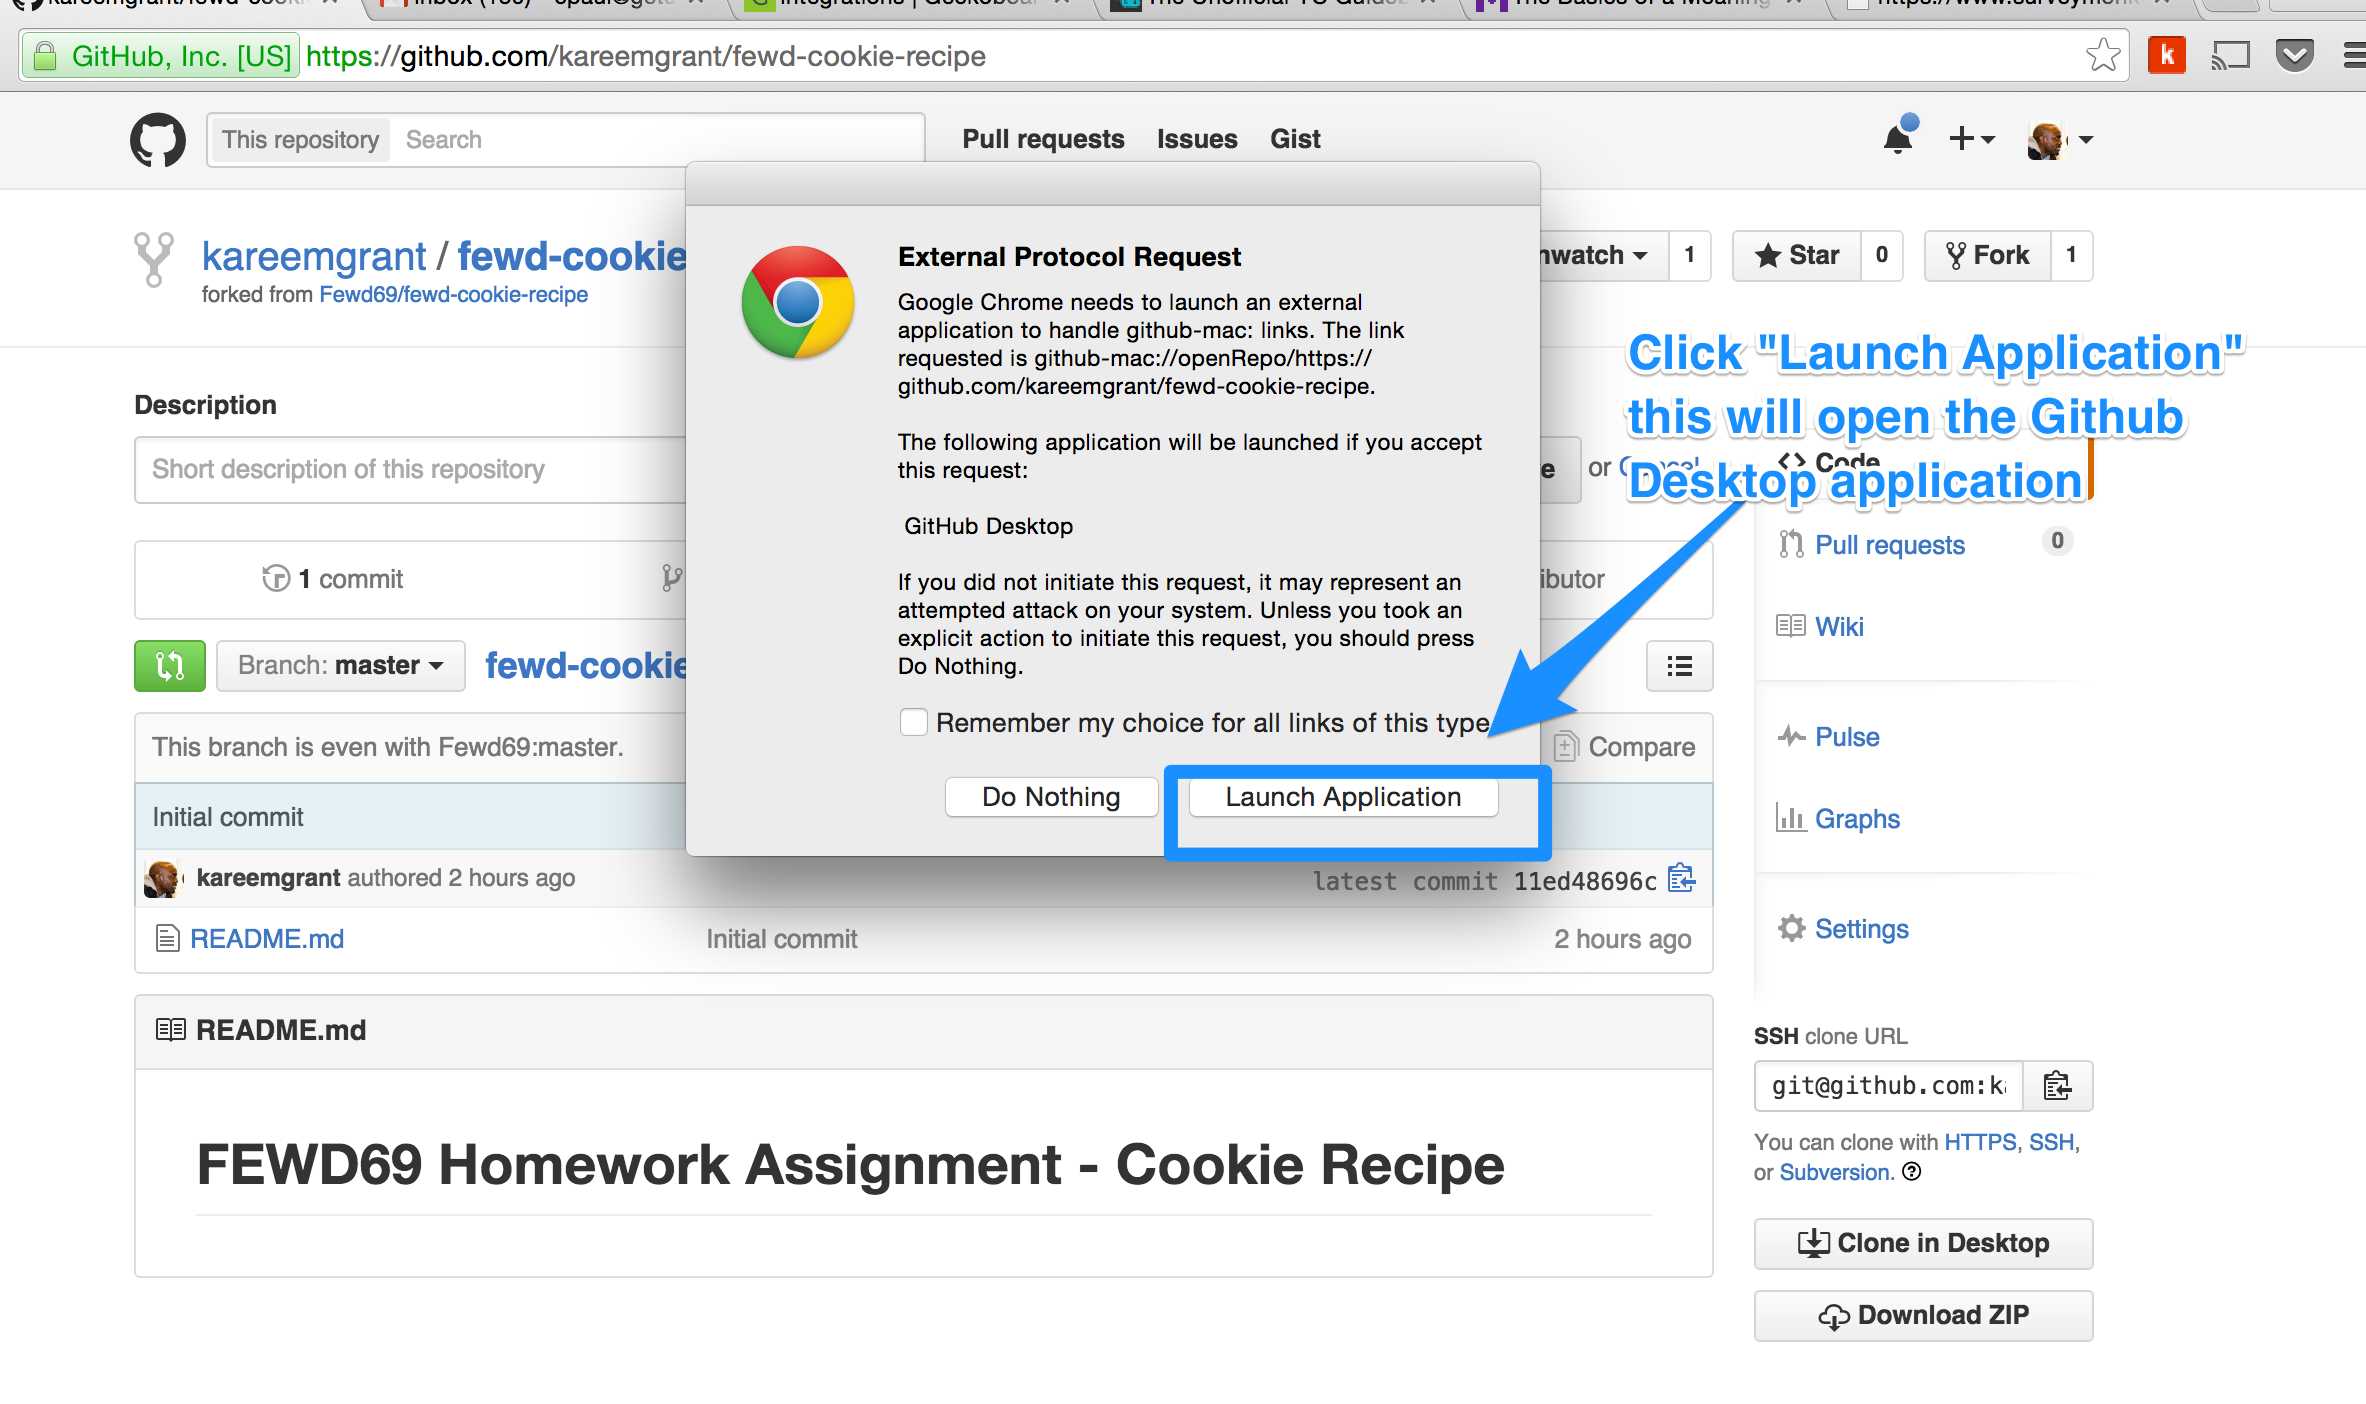
Step 7a: Clone Repository in Github
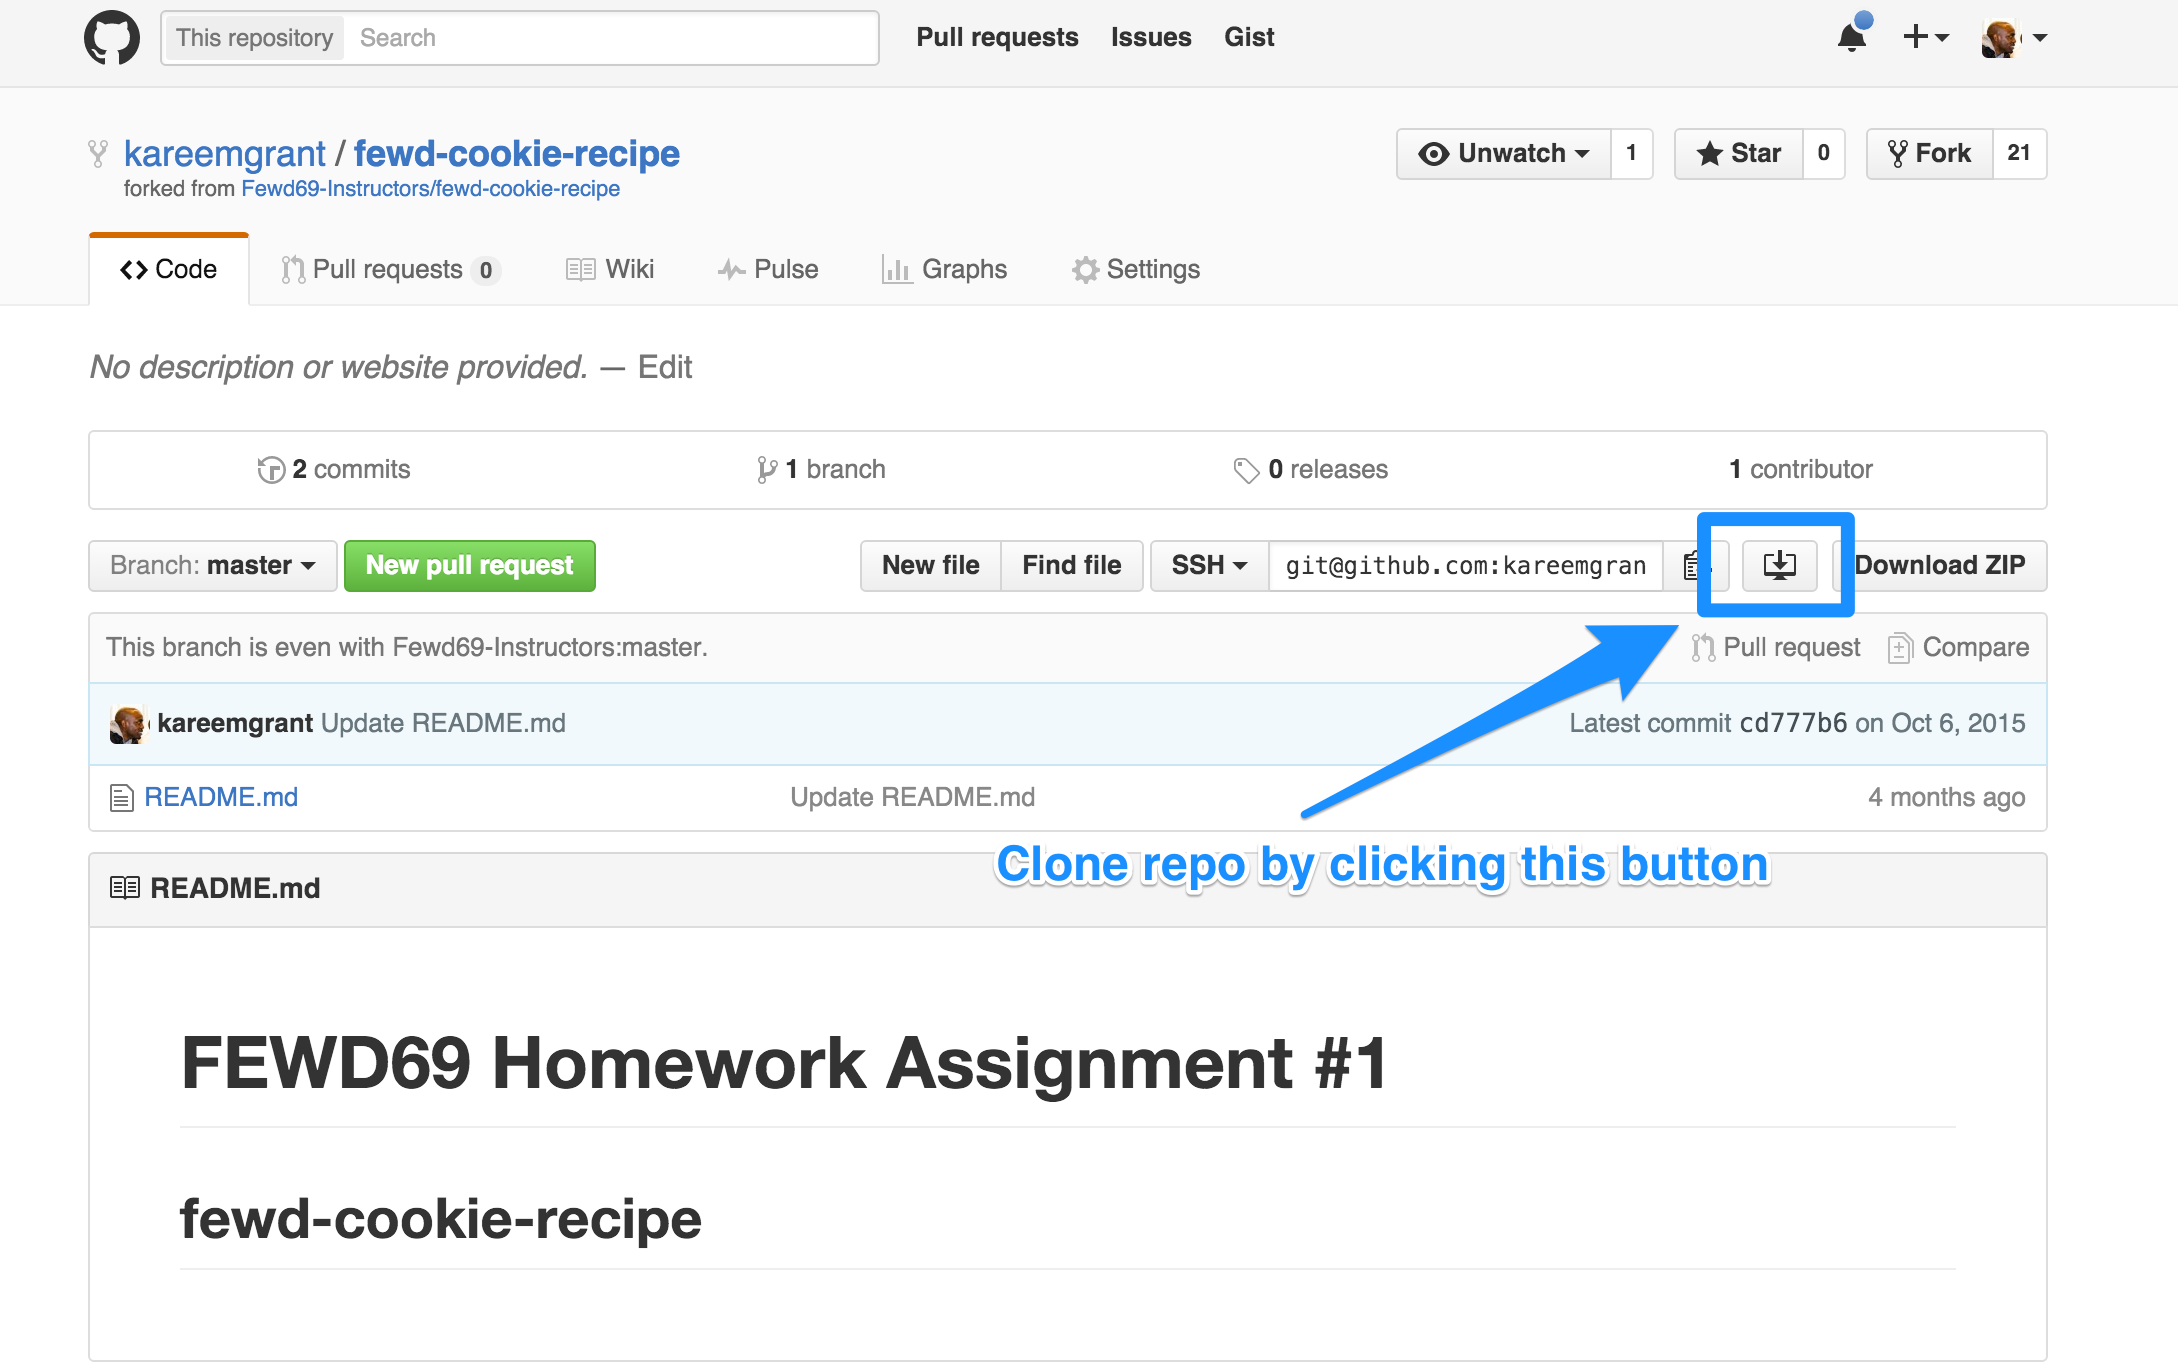
Step 7b: Click “Launch Application” button
- This opens your Github Desktop application
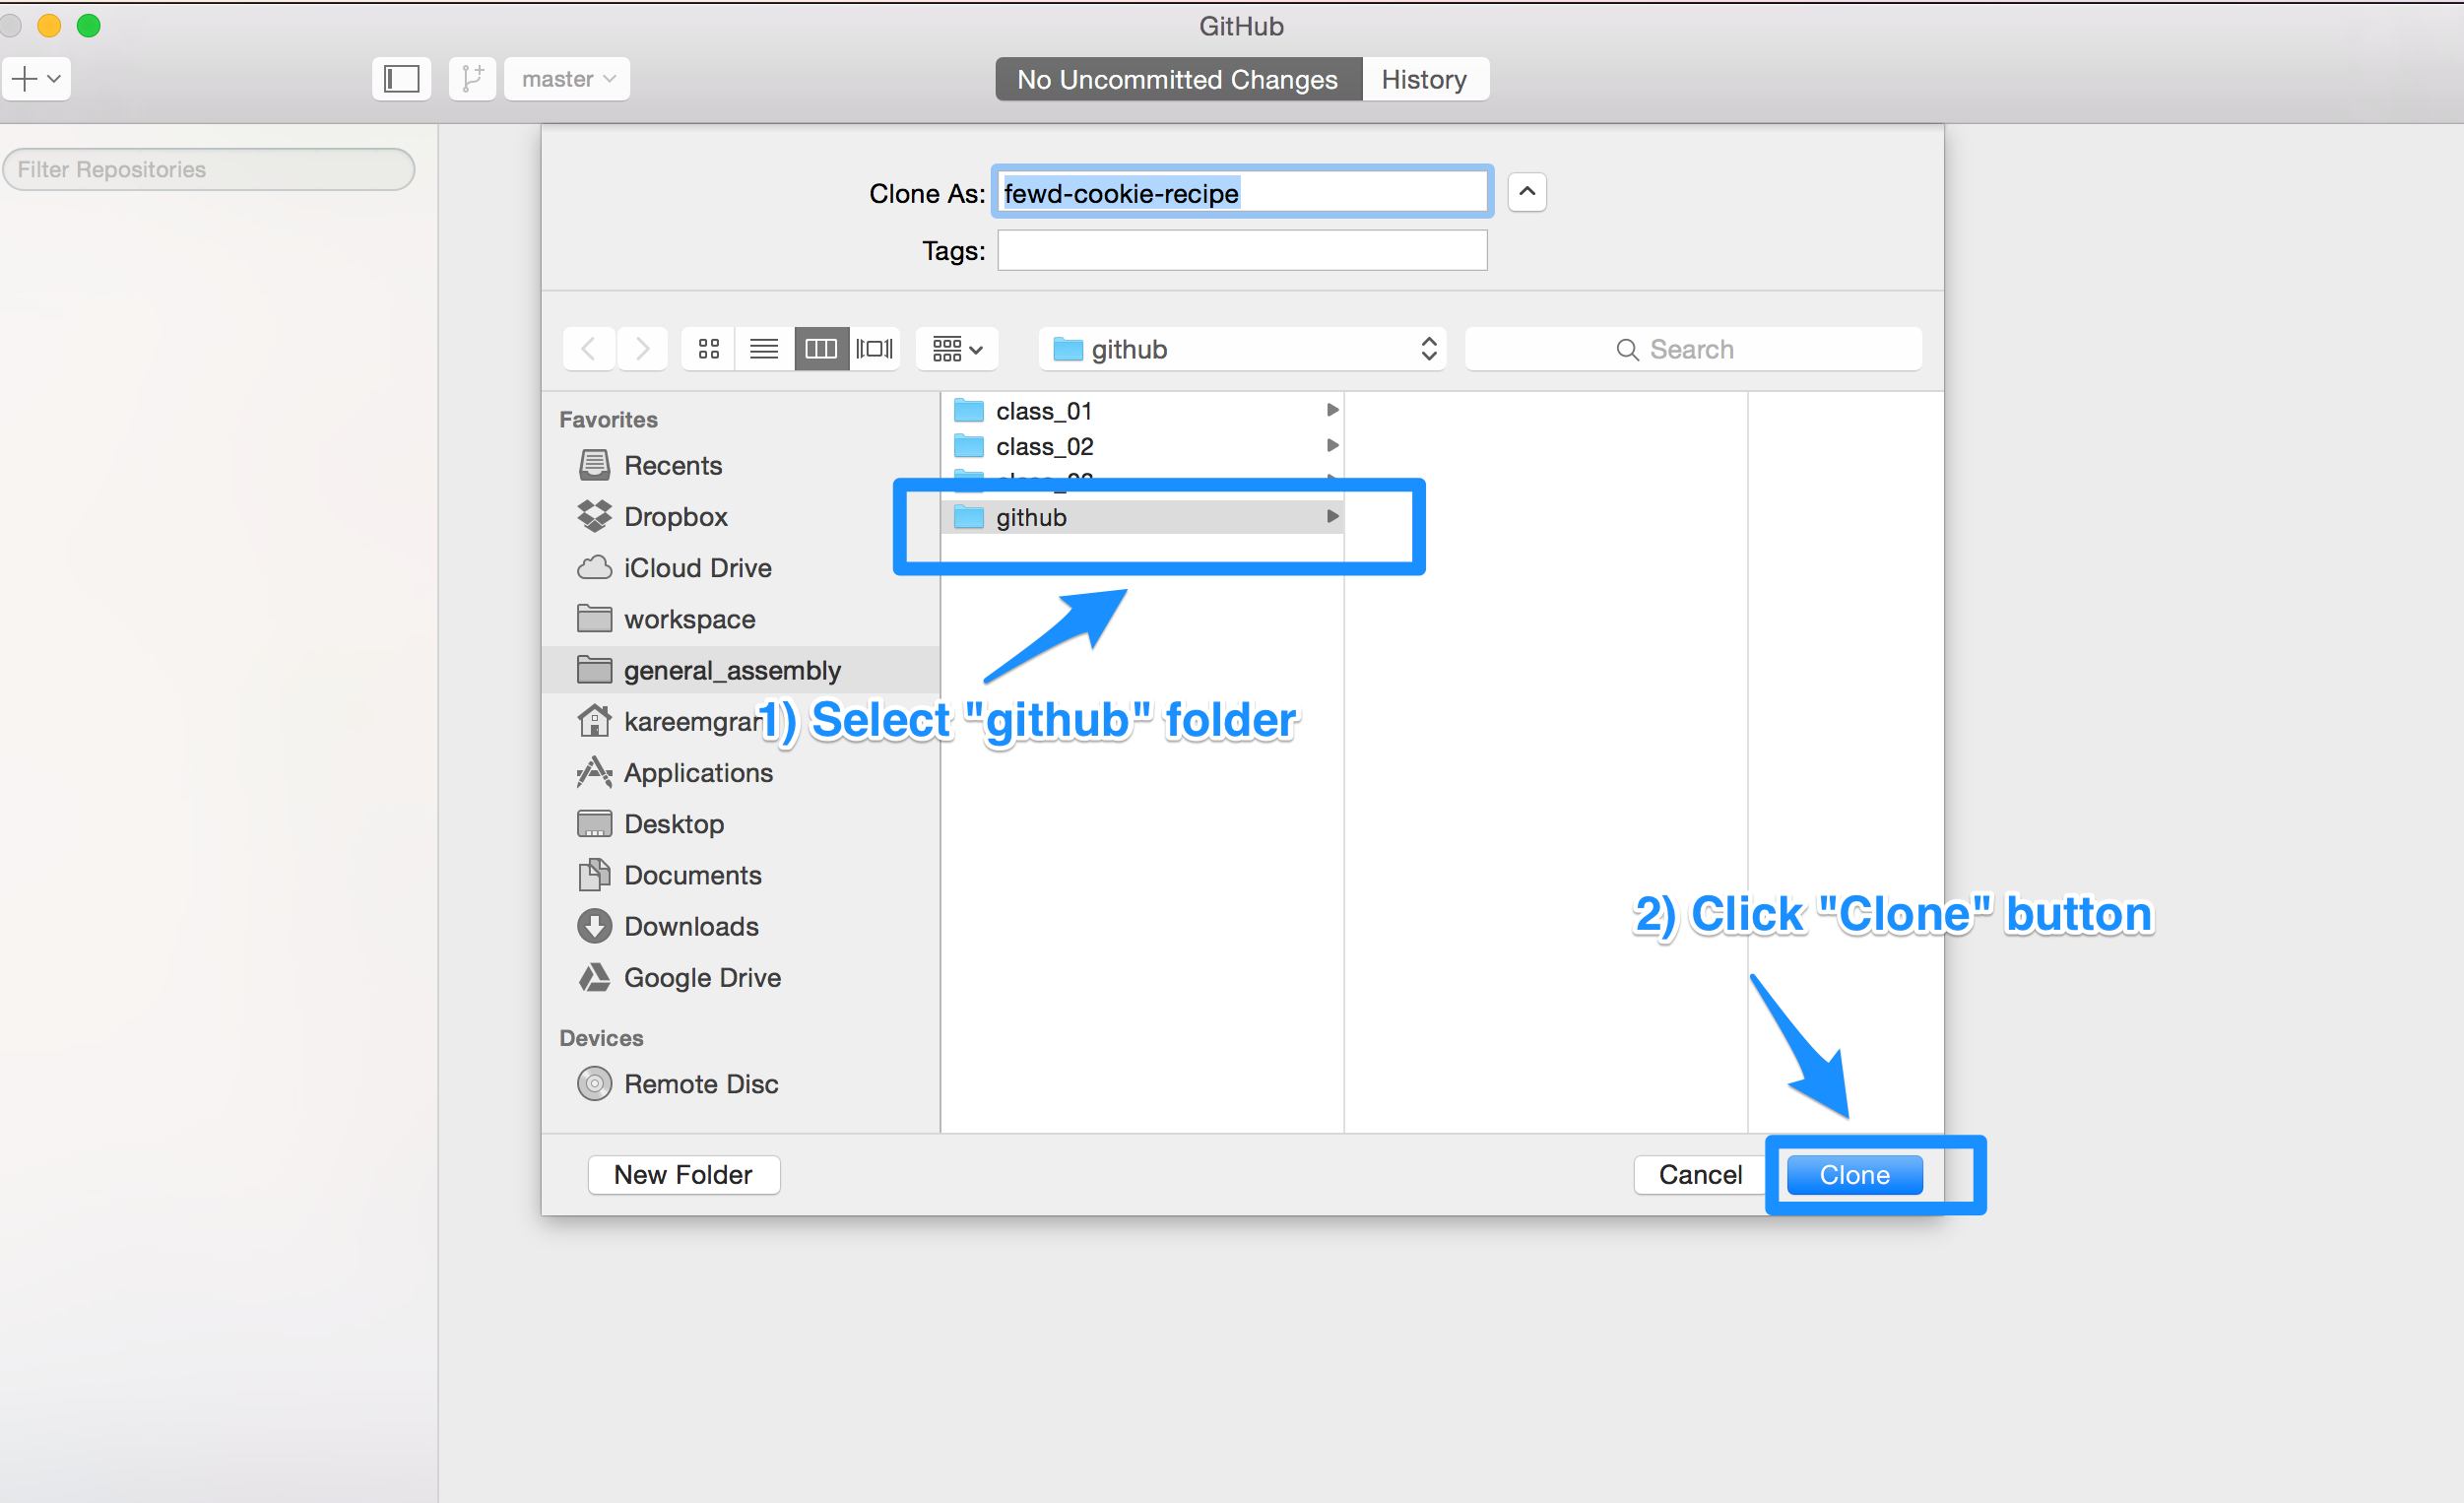
Step 7c: Select your “github” folder and click “clone”
- This is where the project folder will live
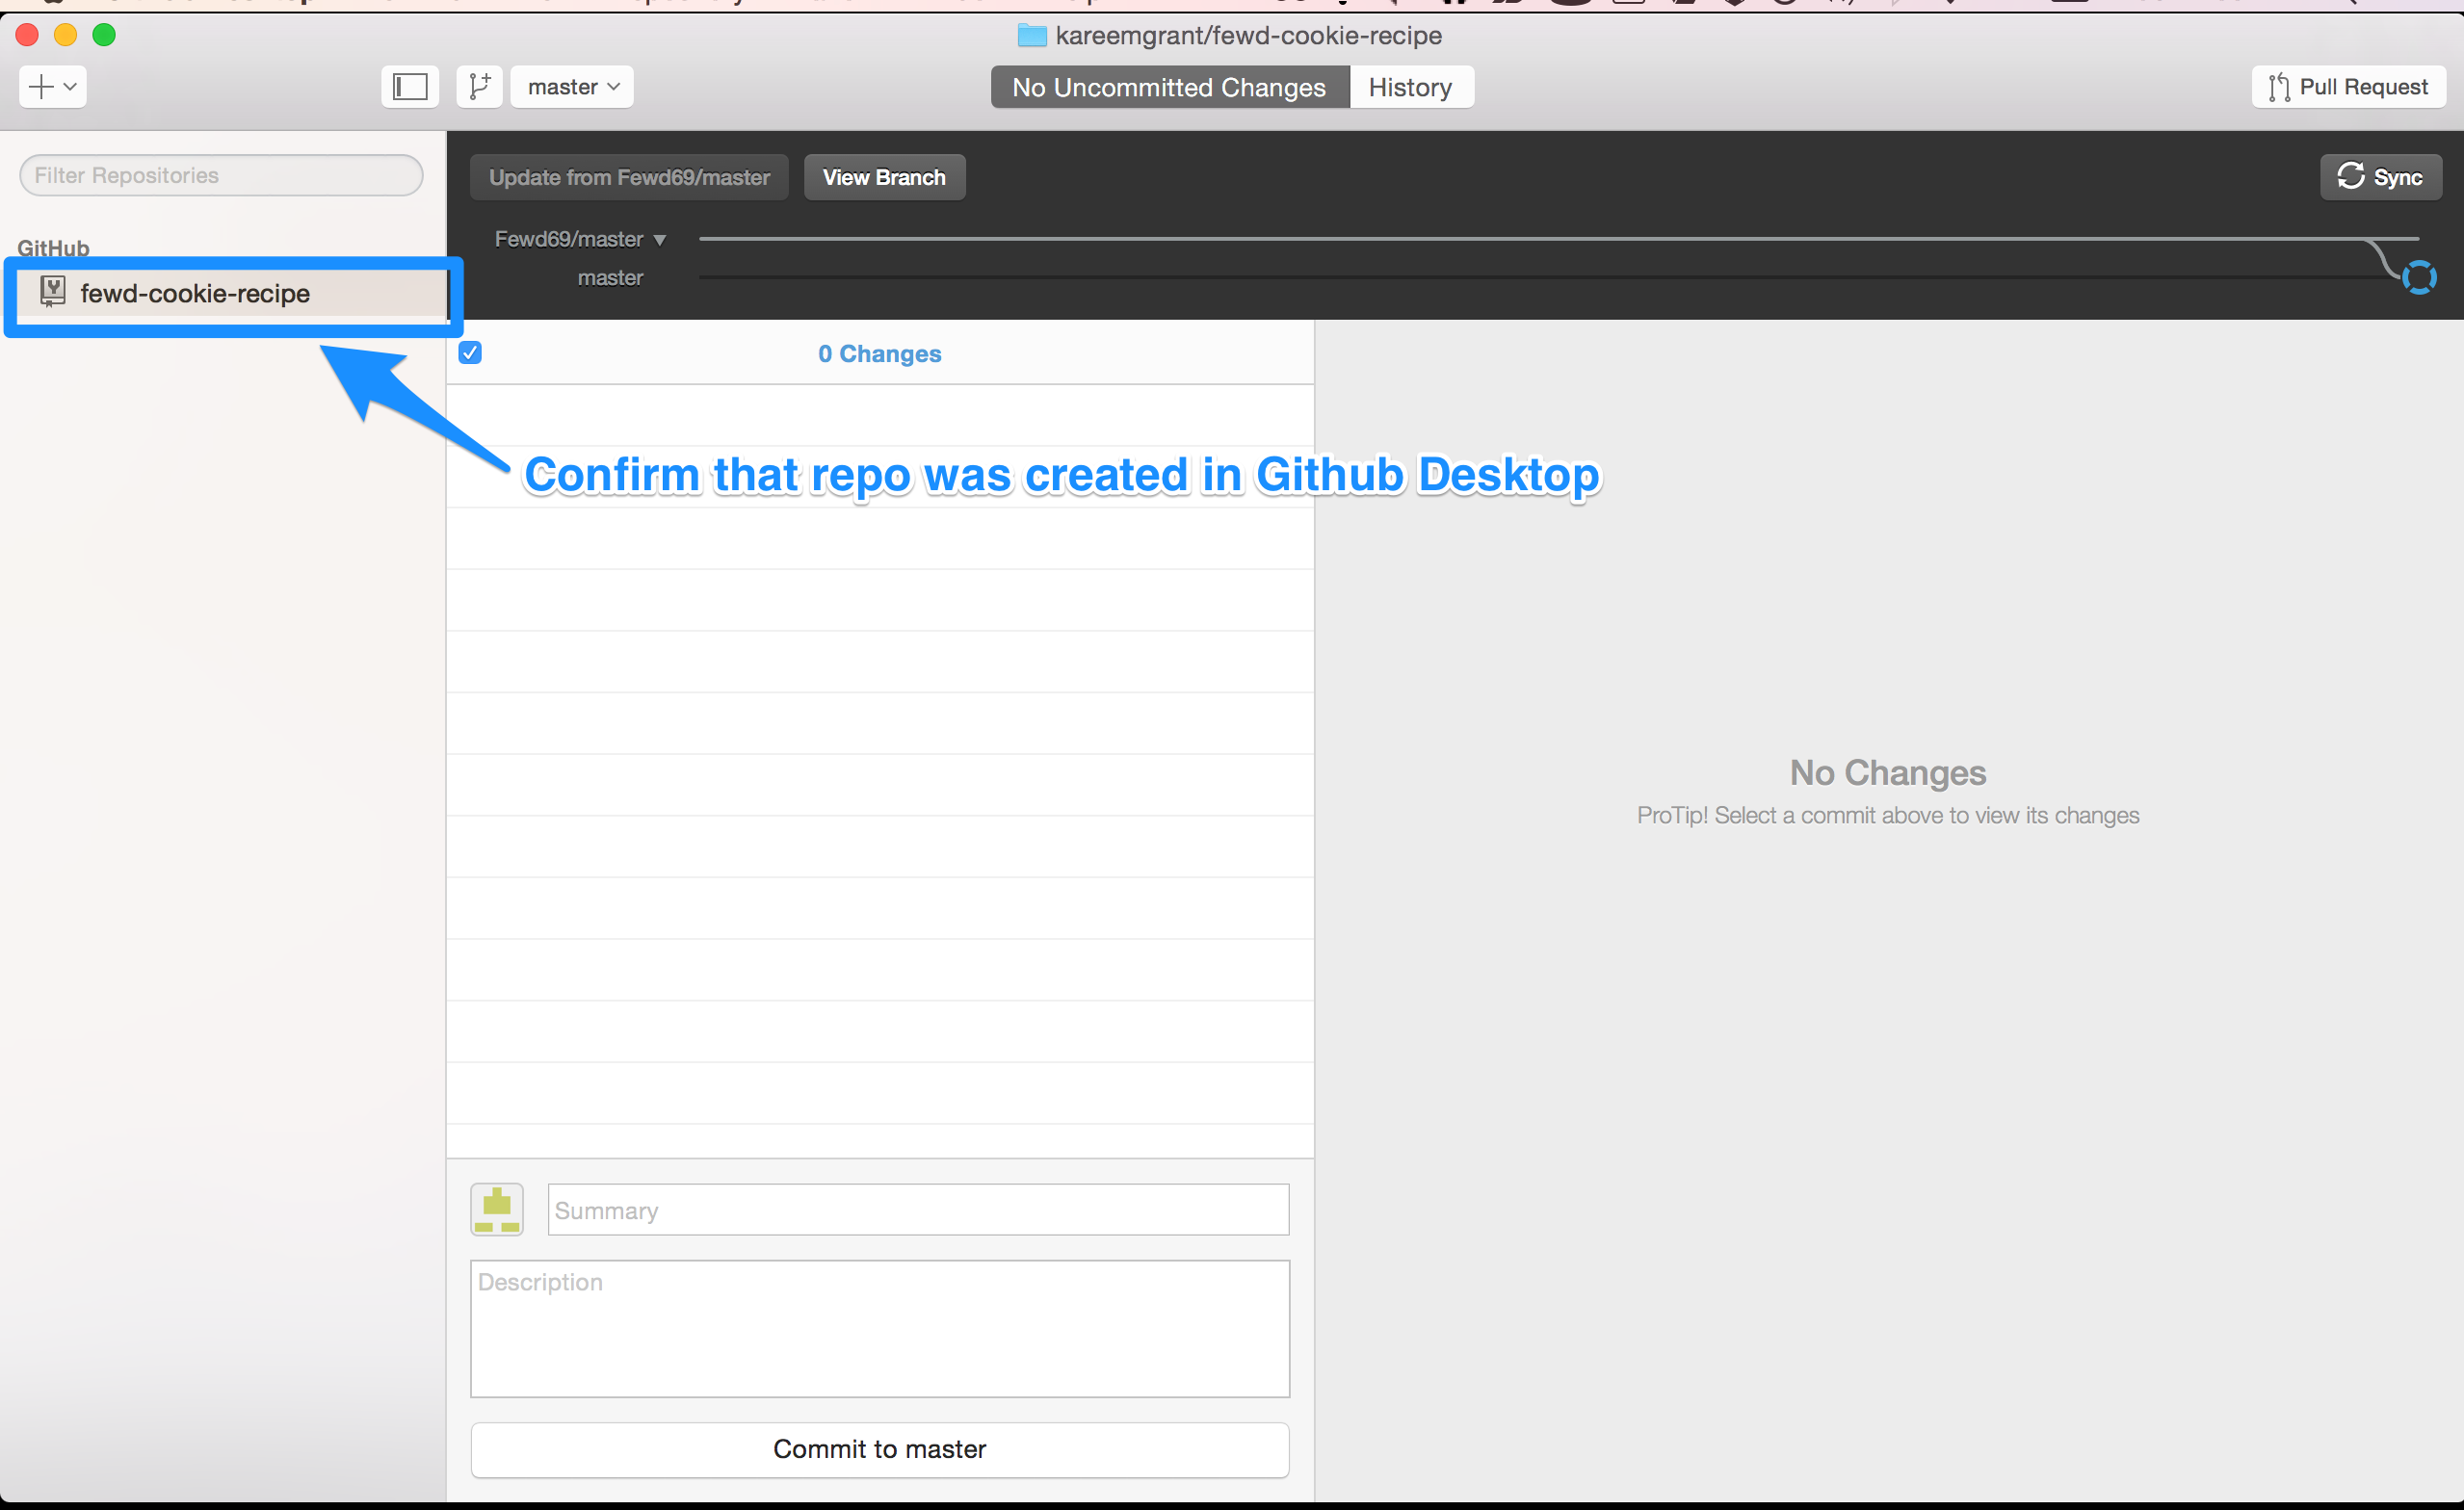
Step 8: Confirm Repo was created in Github Desktop
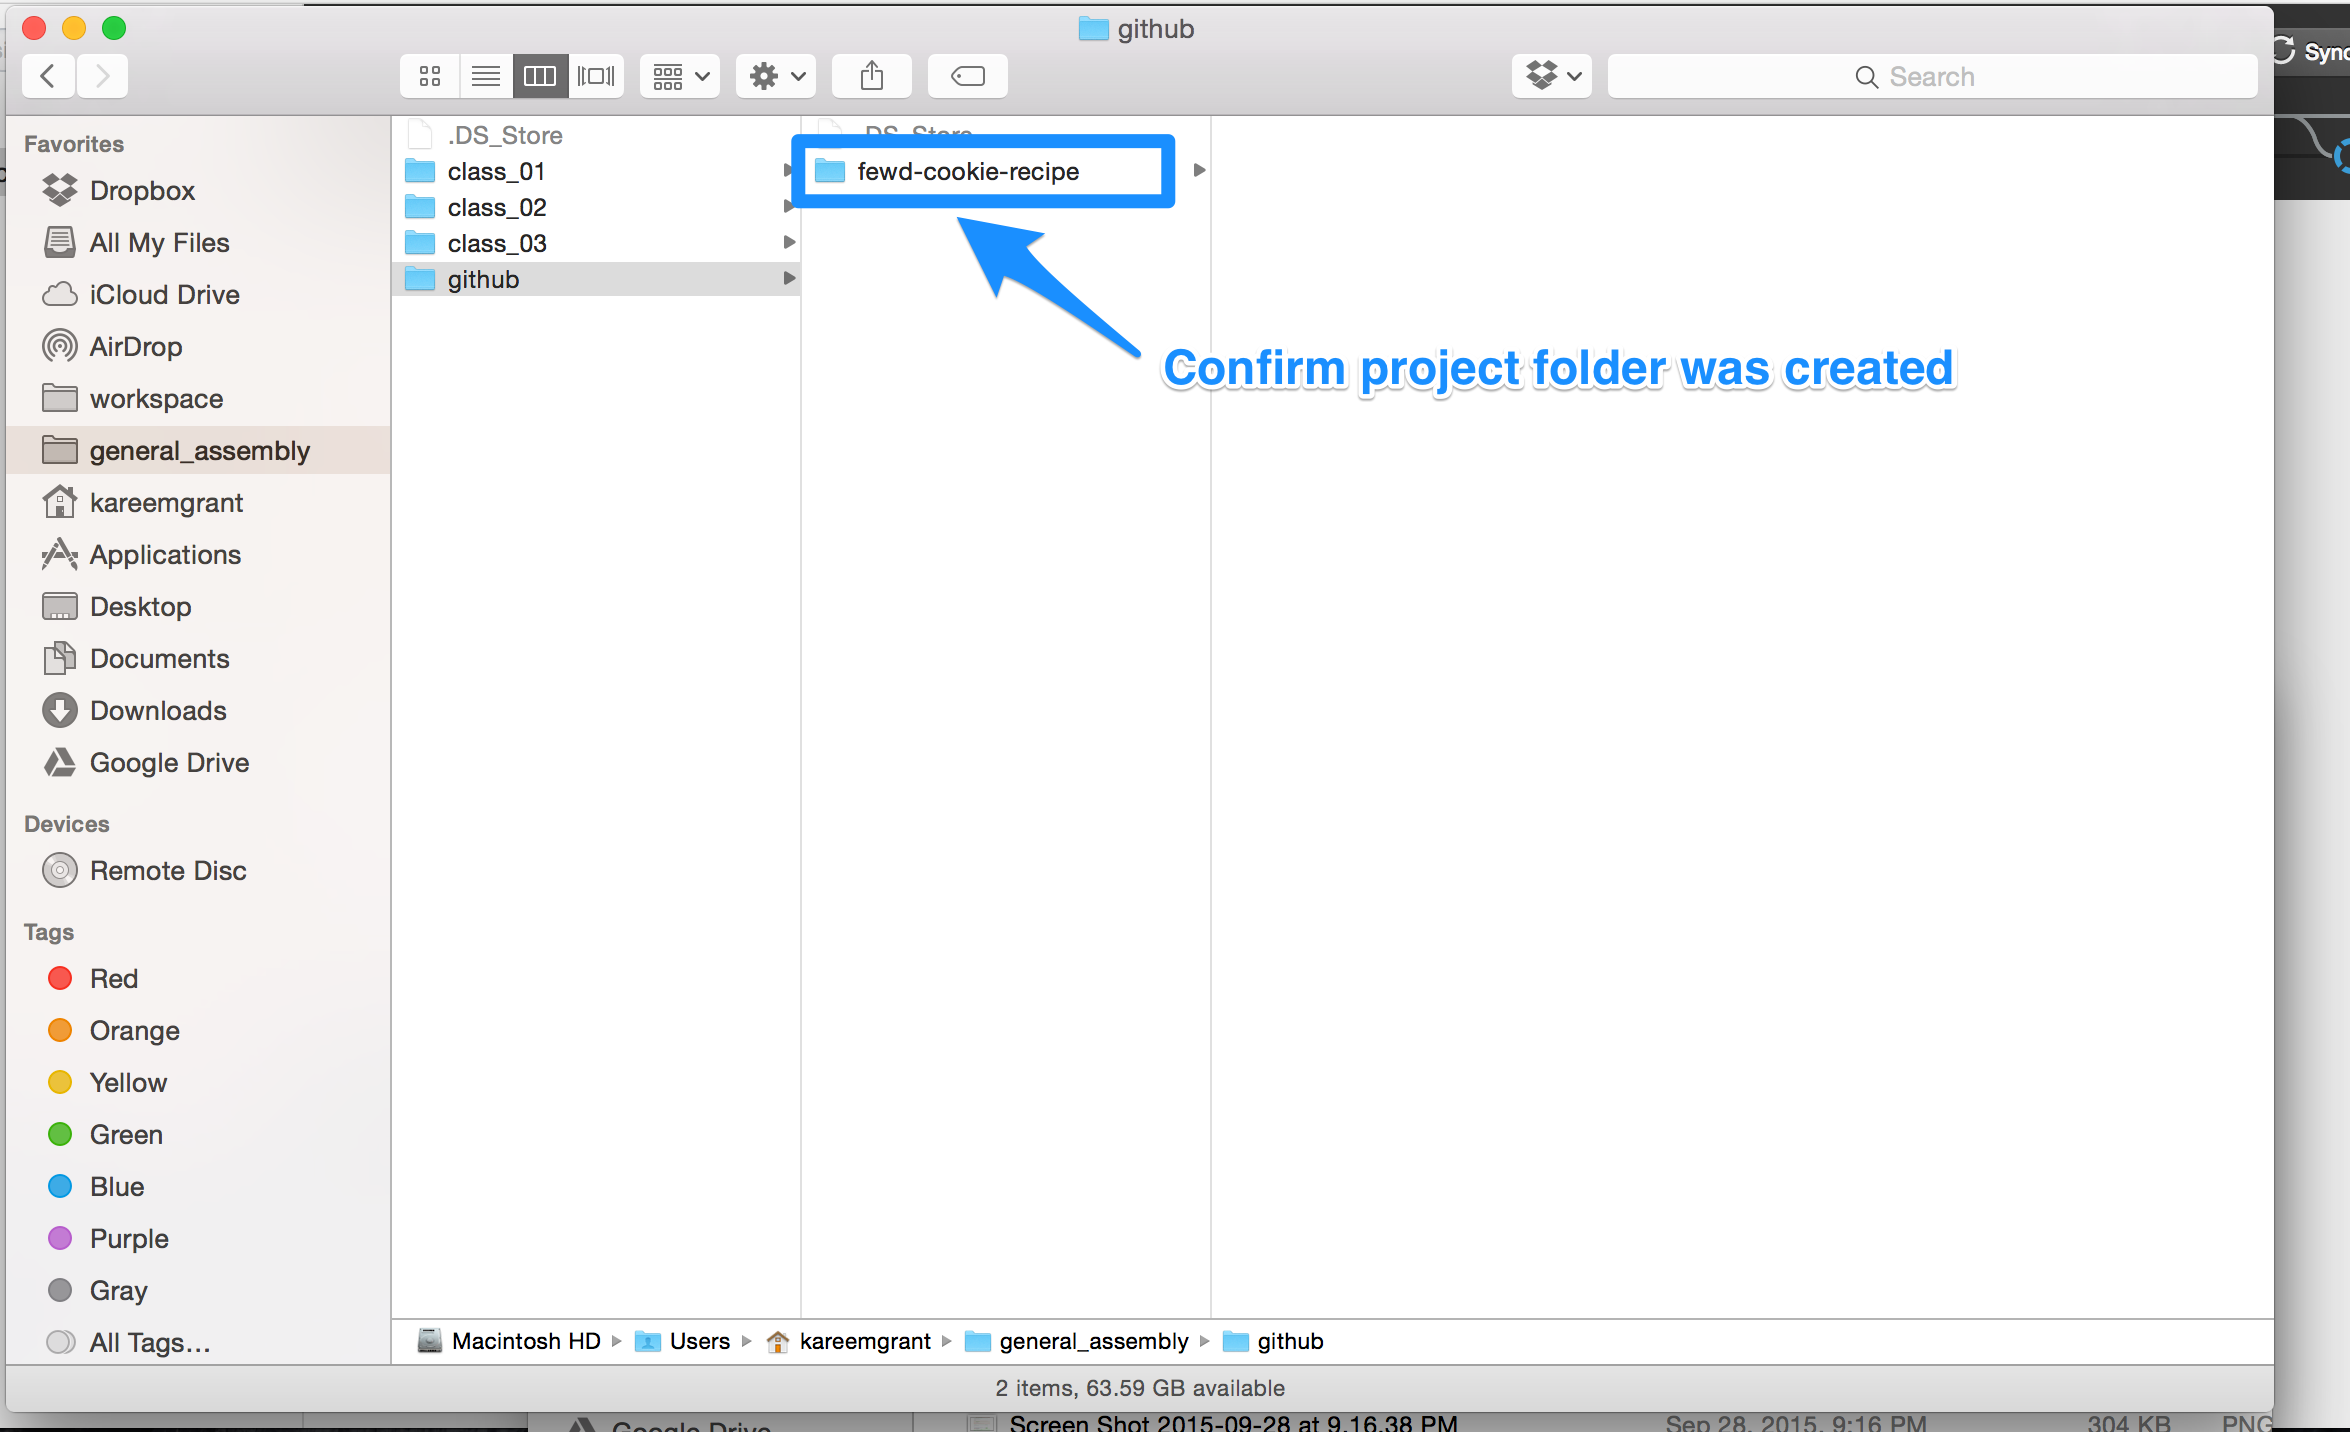
Step 9: Confirm project folder was created in “github” folder
Step 10a: Open project folder with sublime and add code (as you normally would)
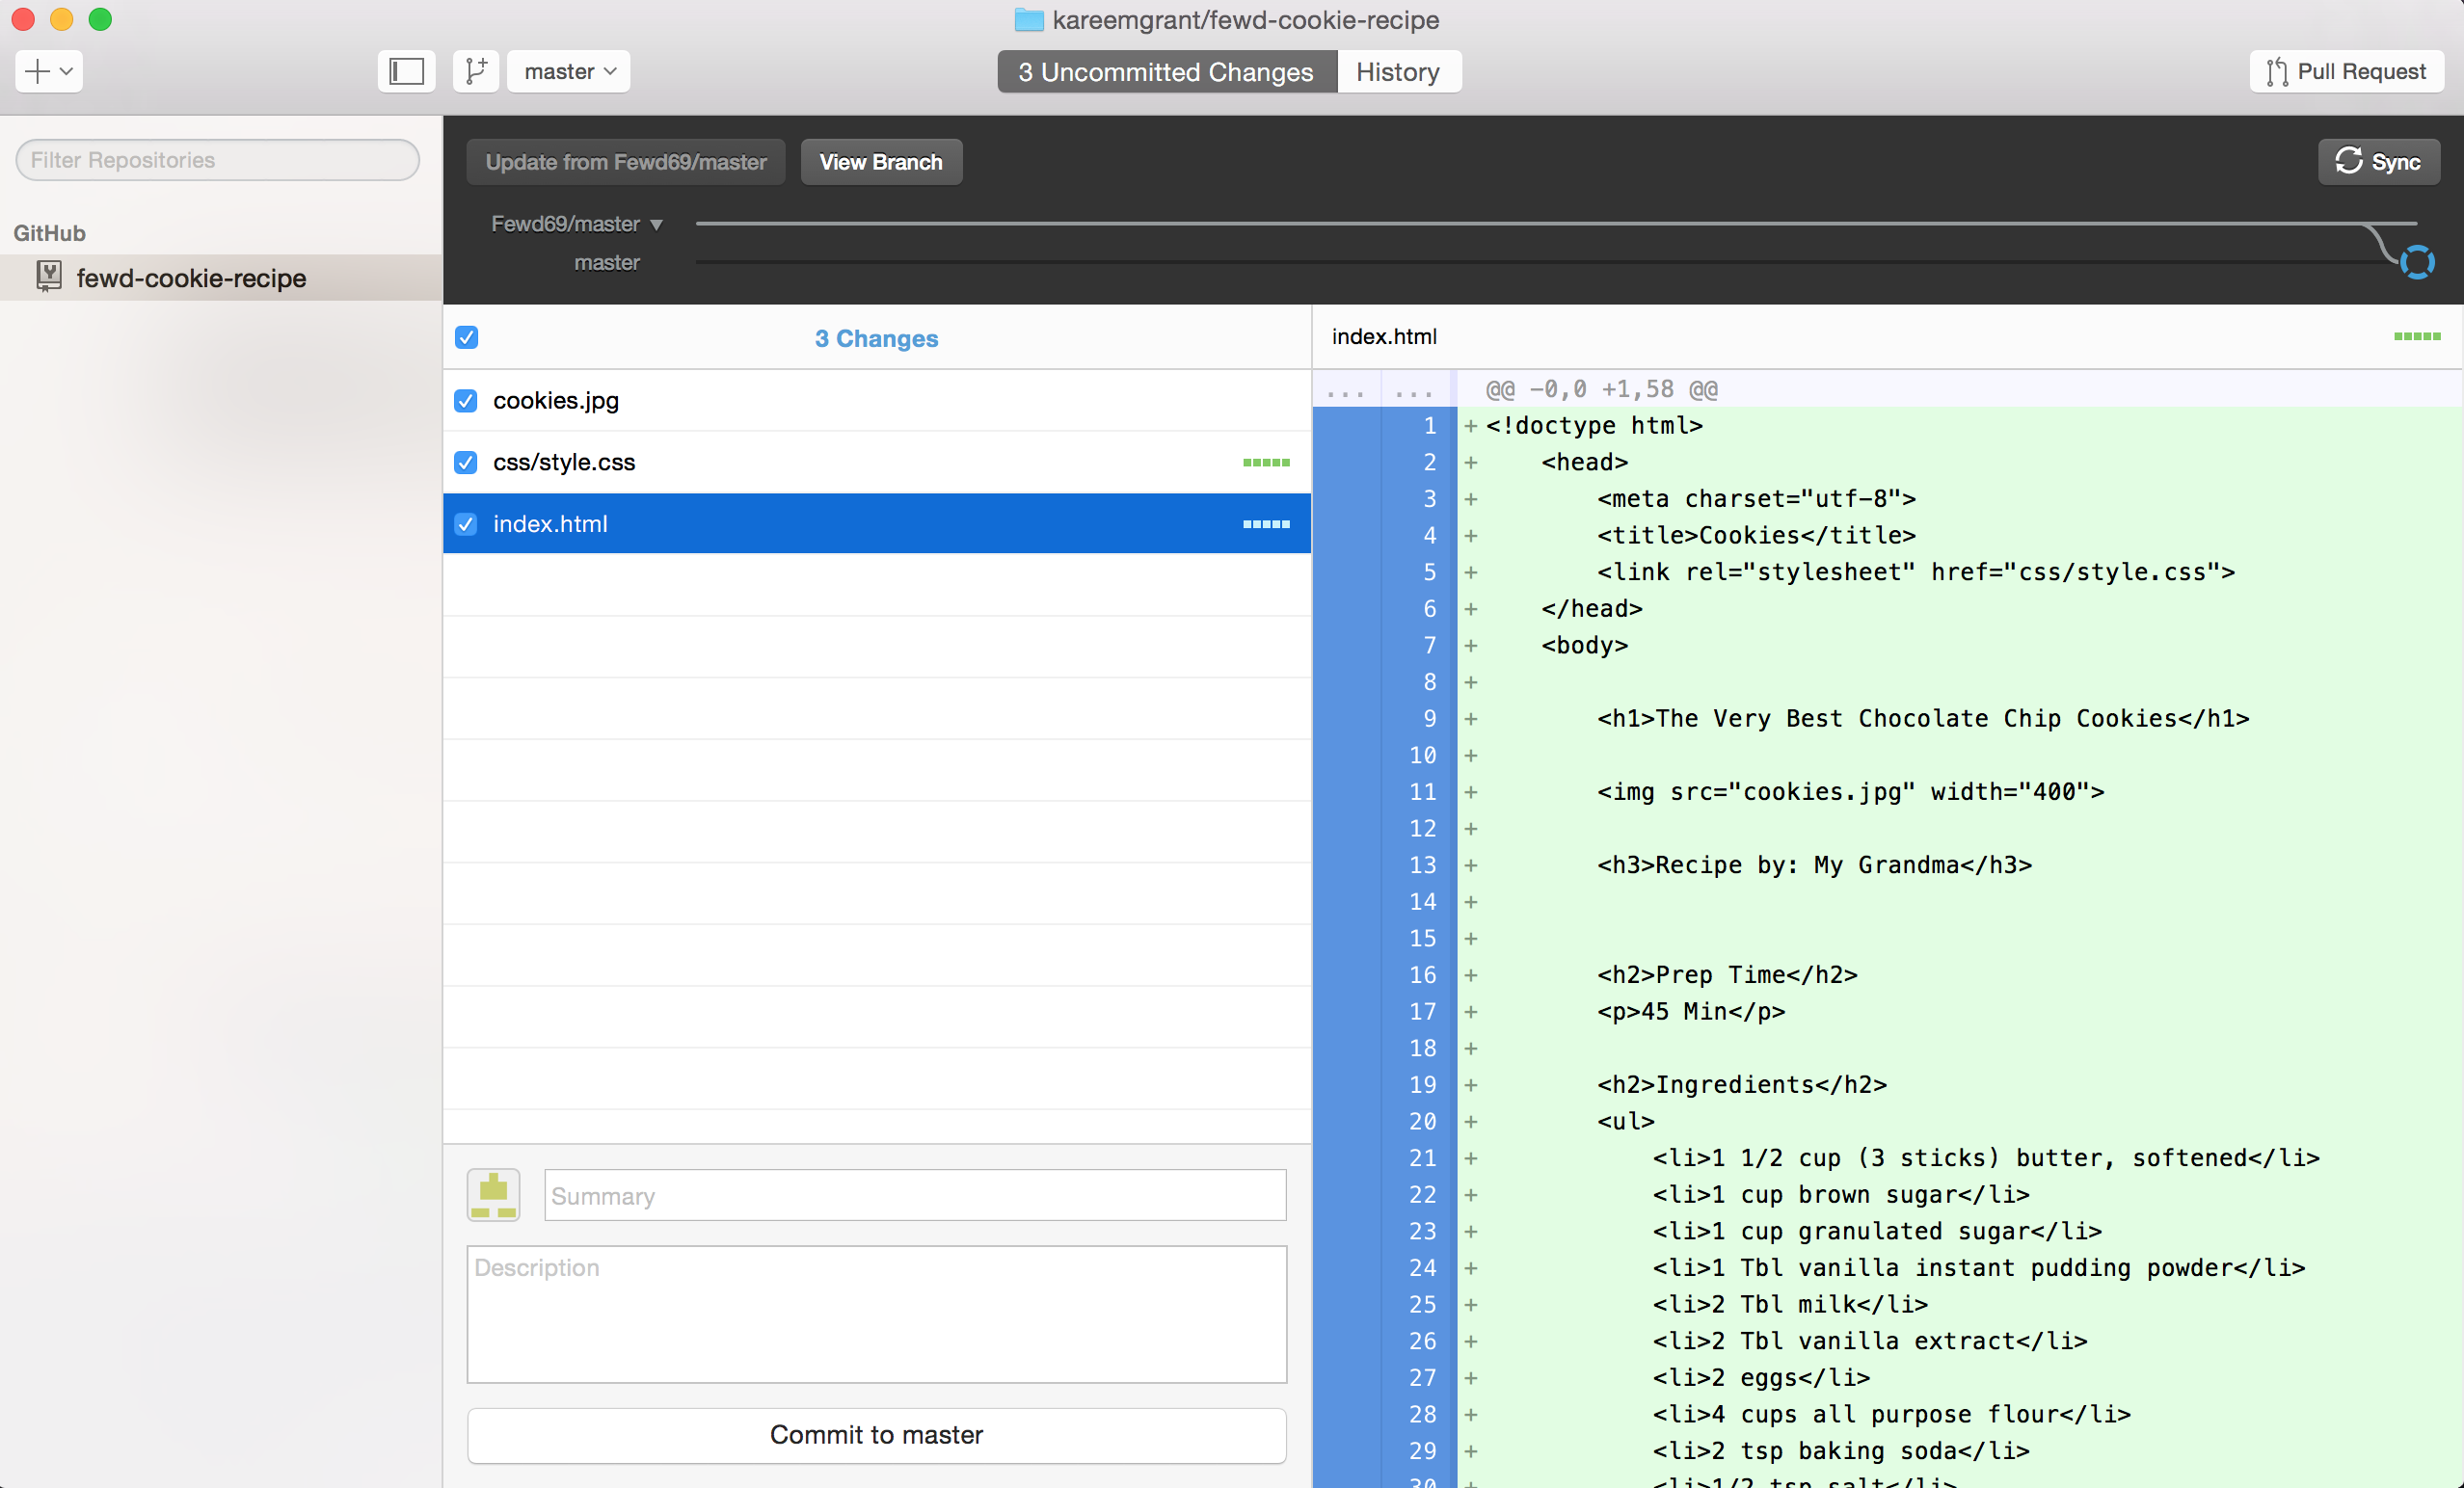
Step 10b: View changes in Github Desktop
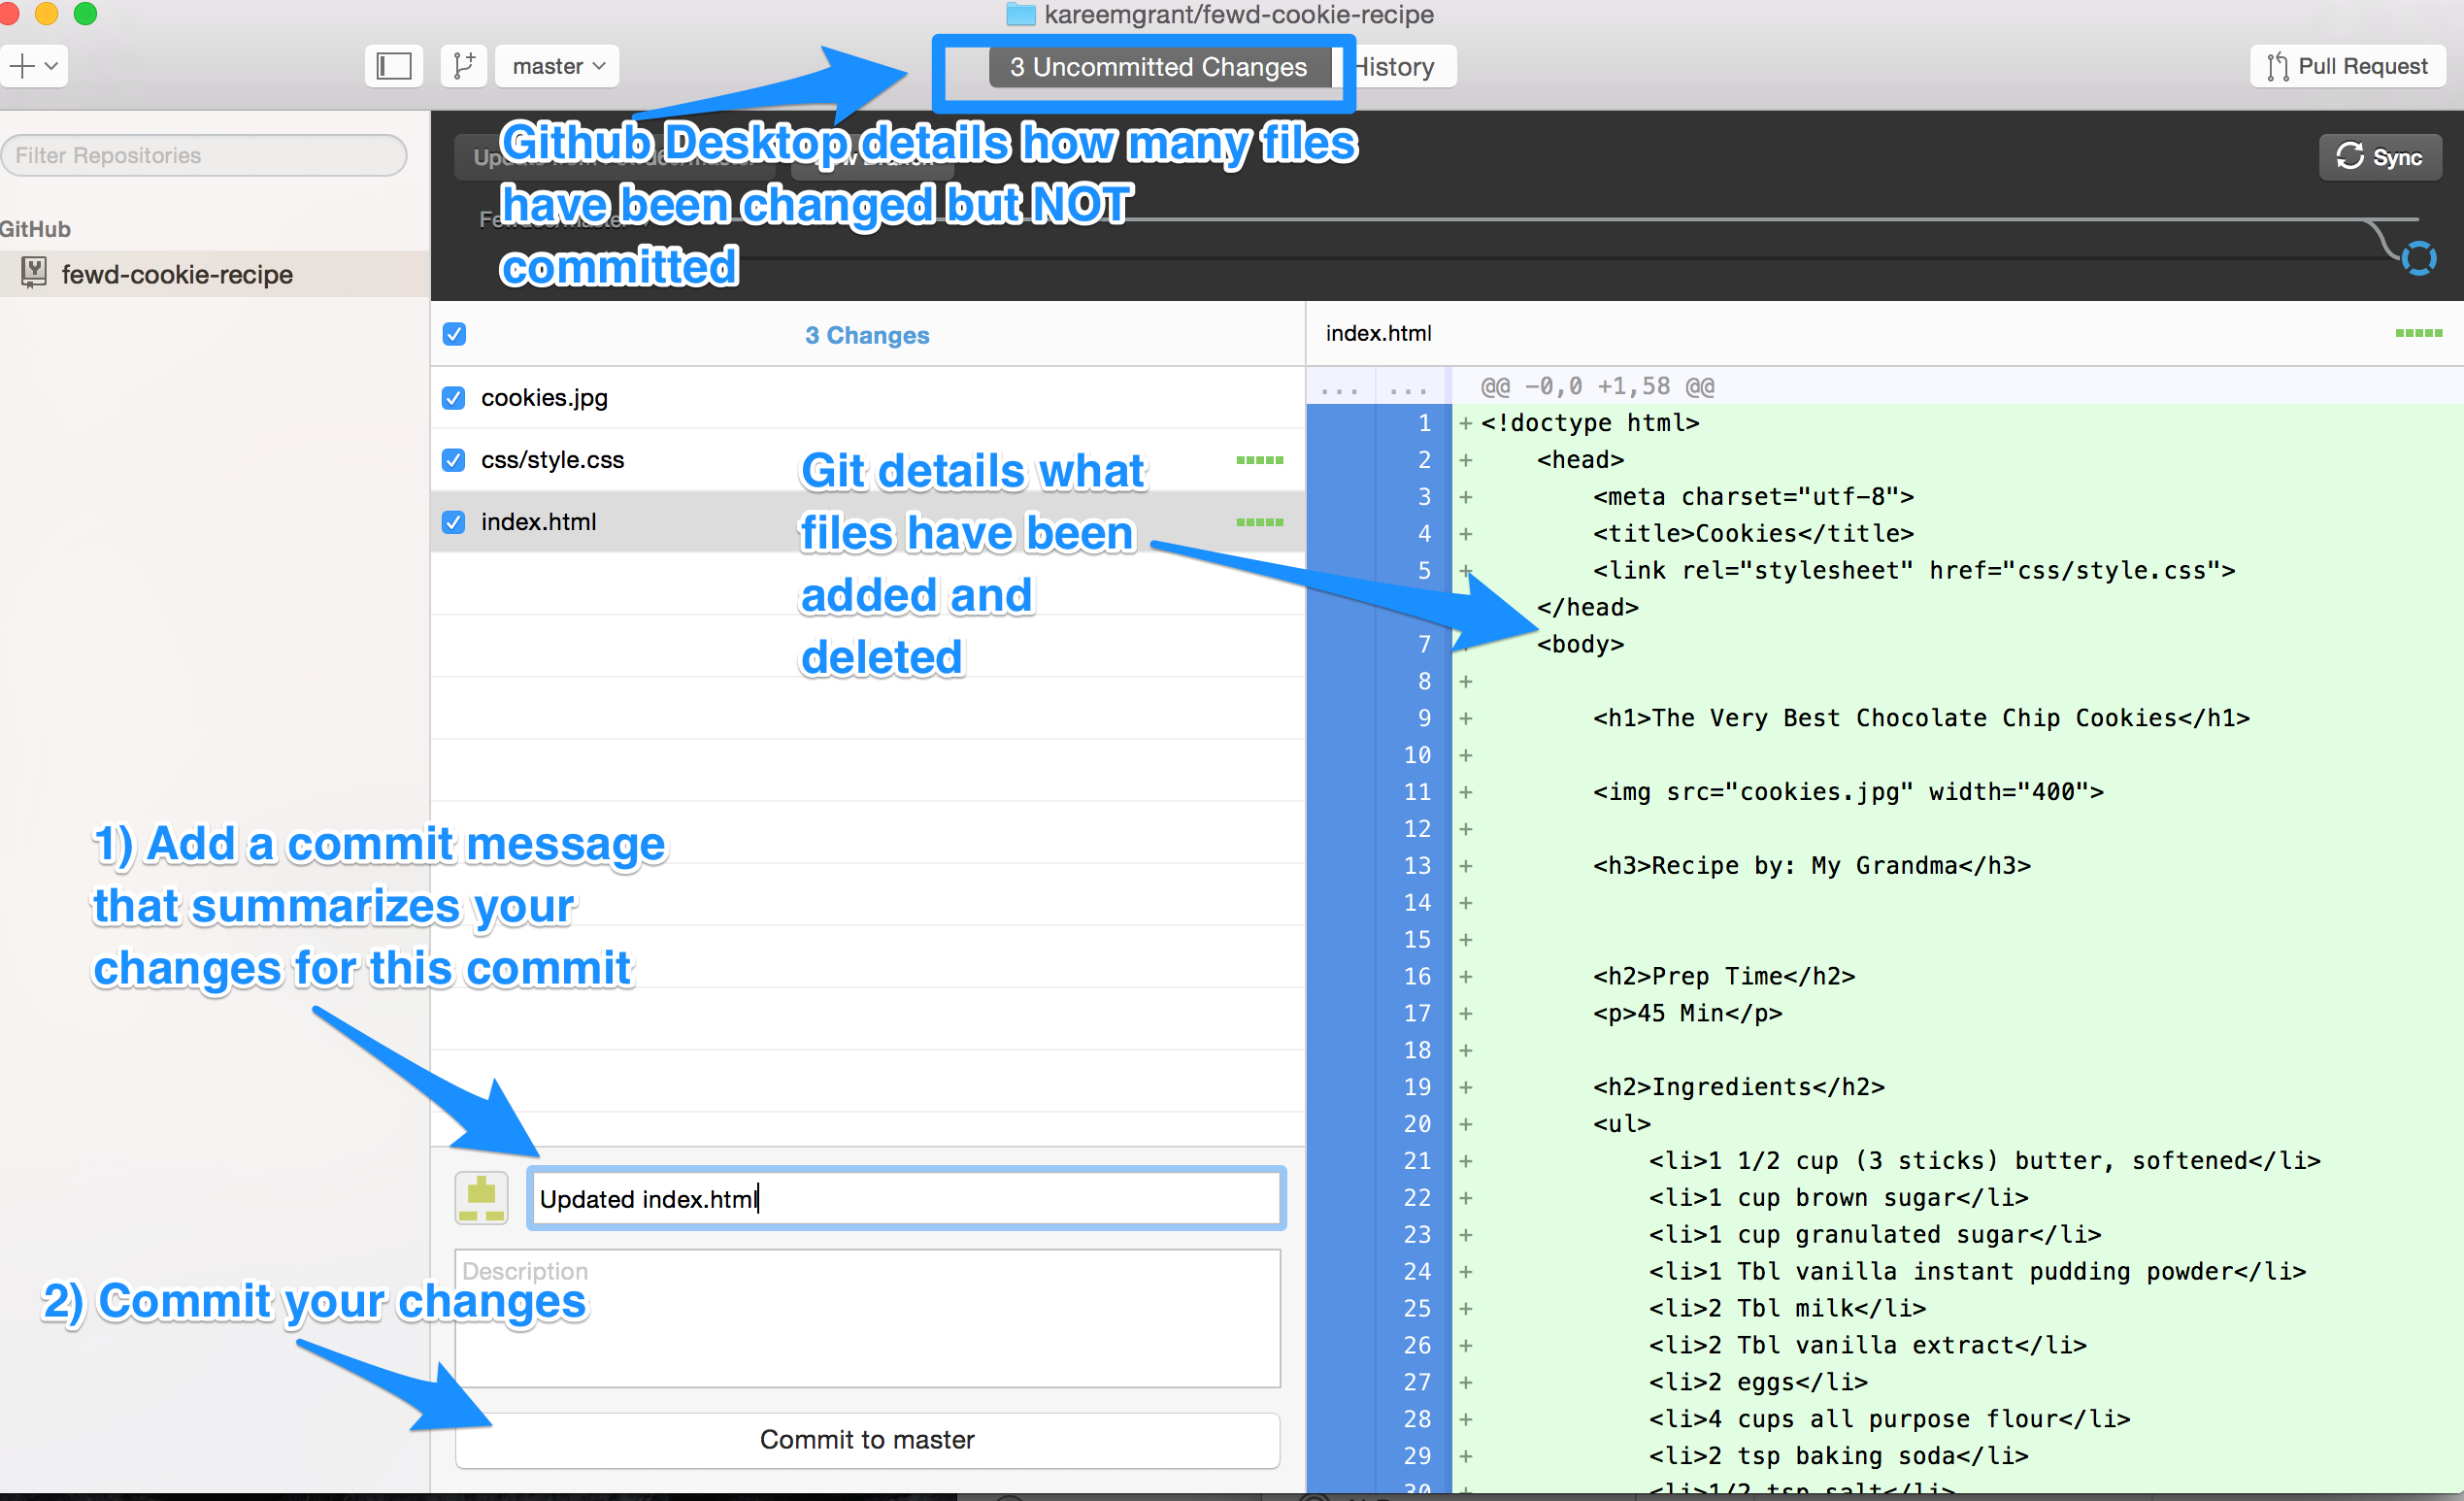
Step 11: Commit Your Changes
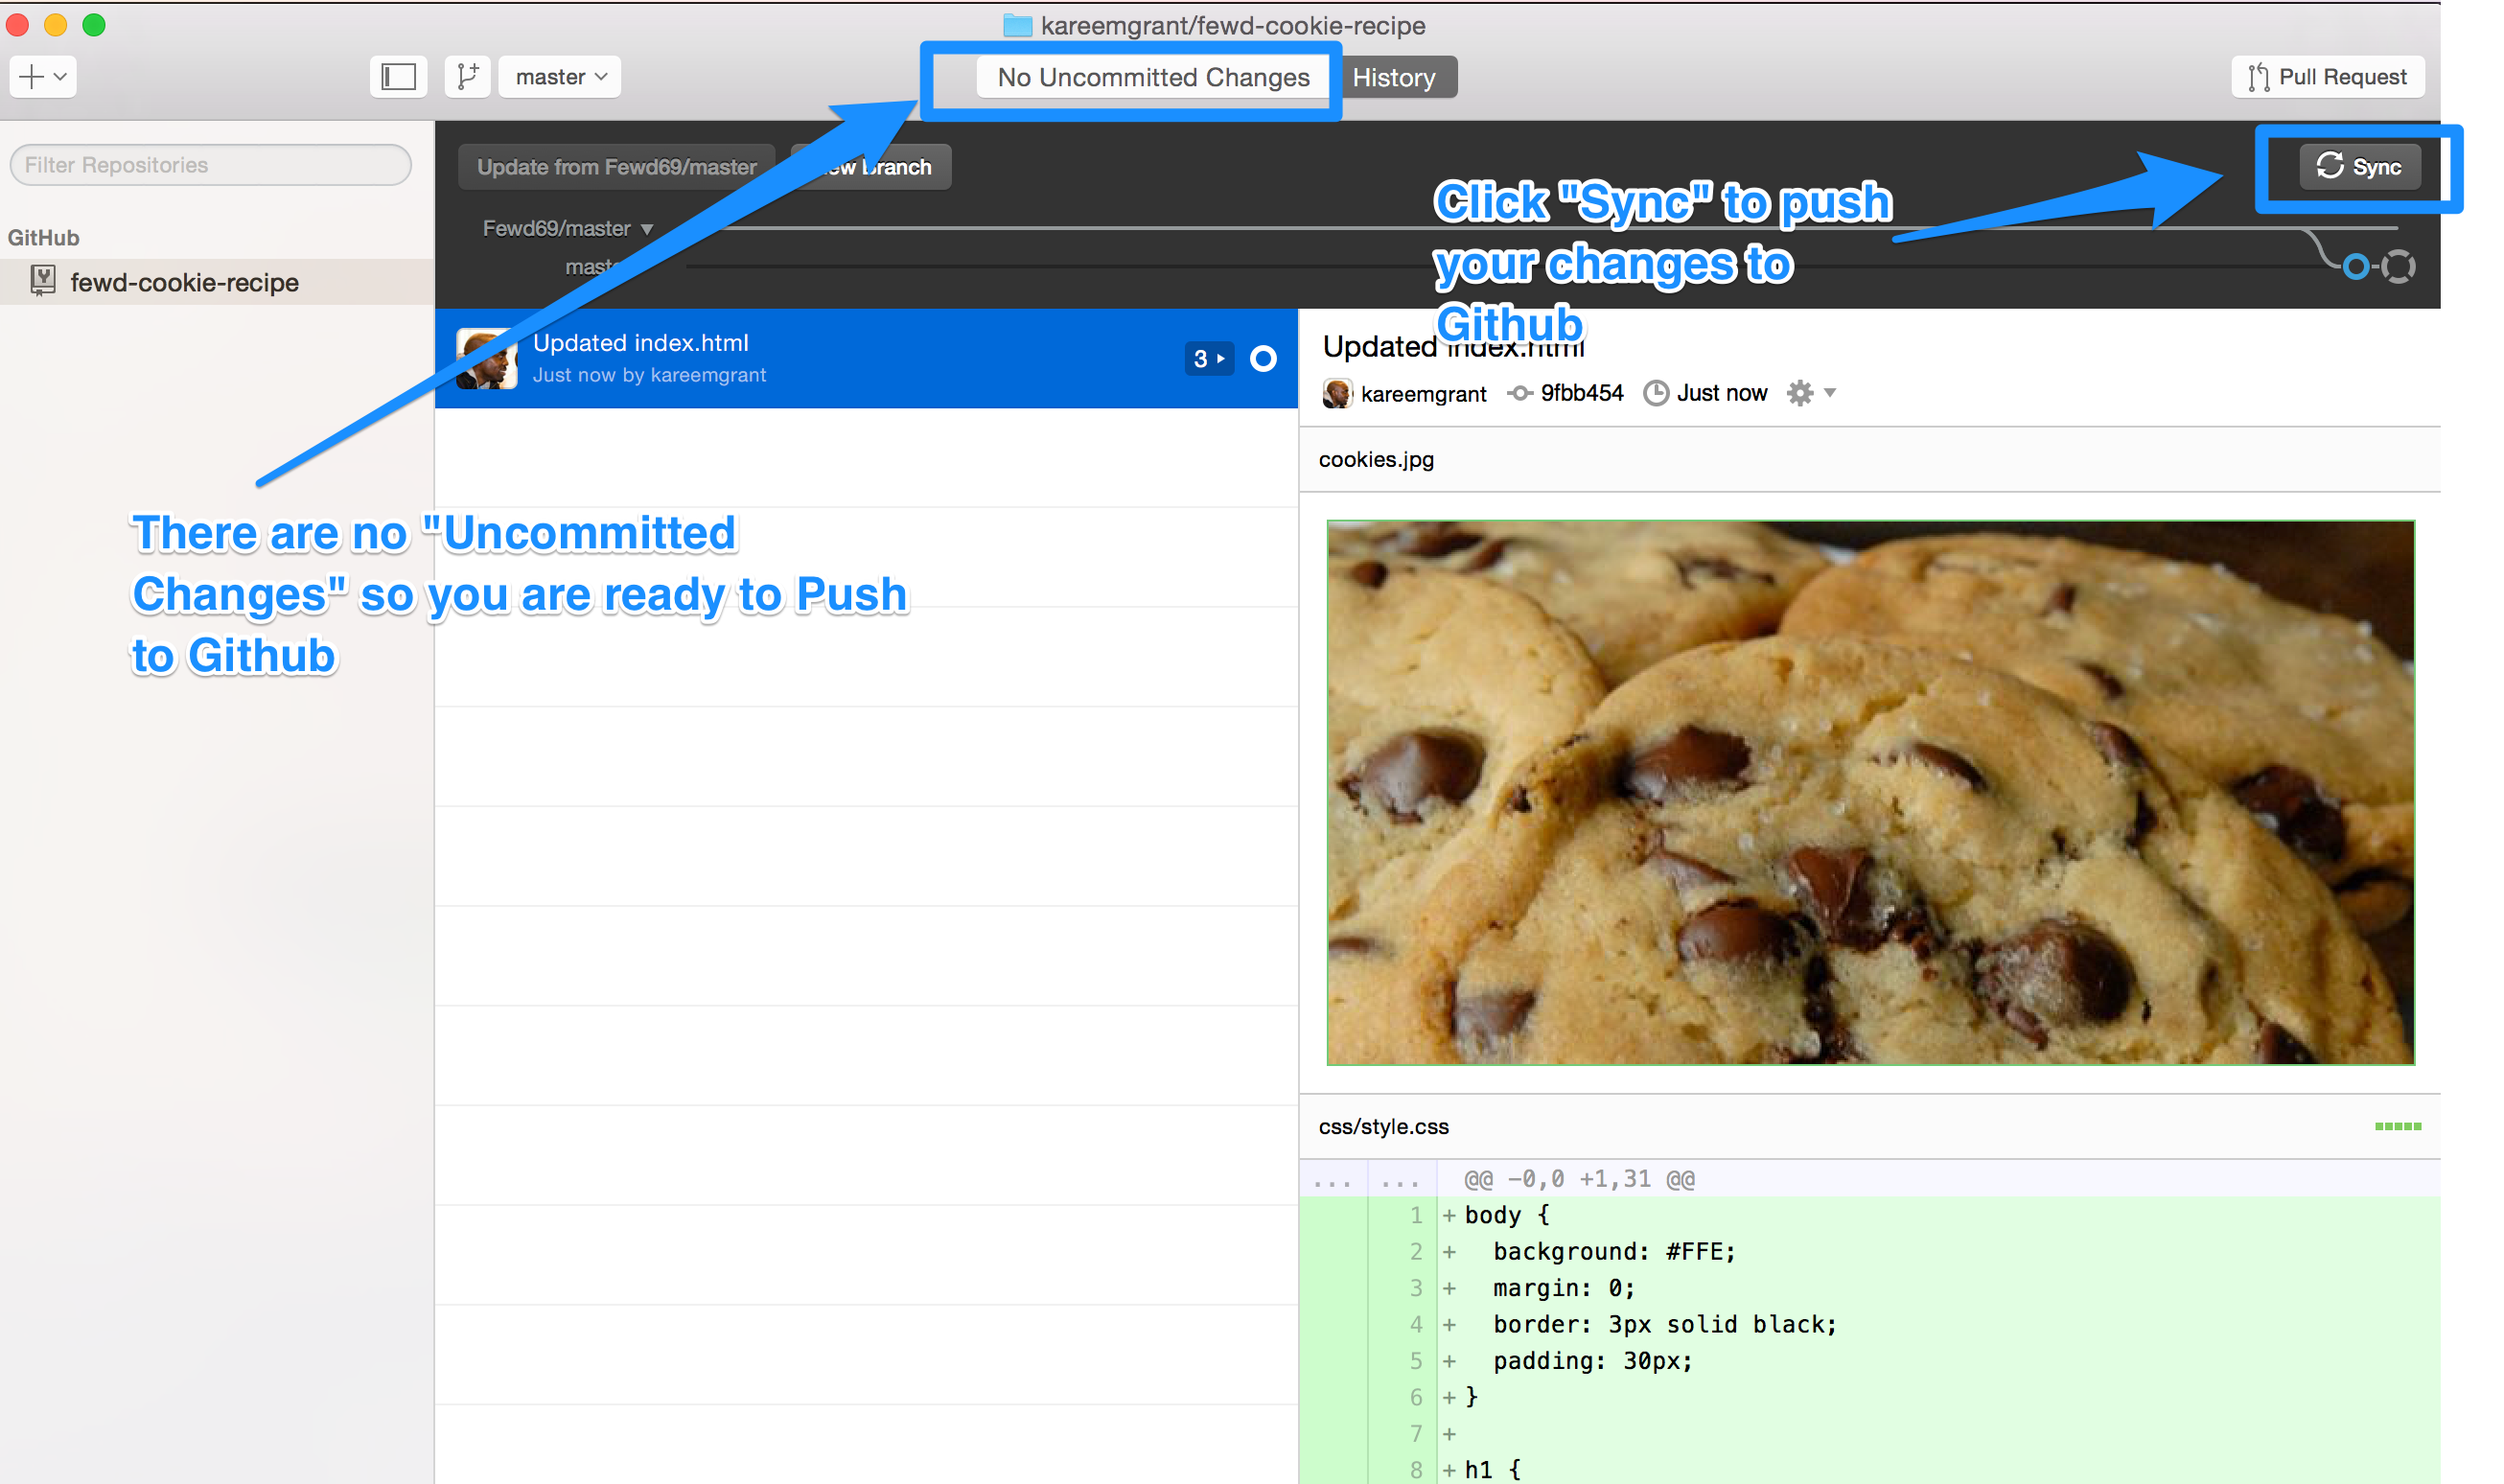
Step 12: Push your changes to Github.com
Repeat Steps 10 through 12 - as many times as needed
Submitting Your Assignment
Step 13a: Create a Pull Request in Github Desktop
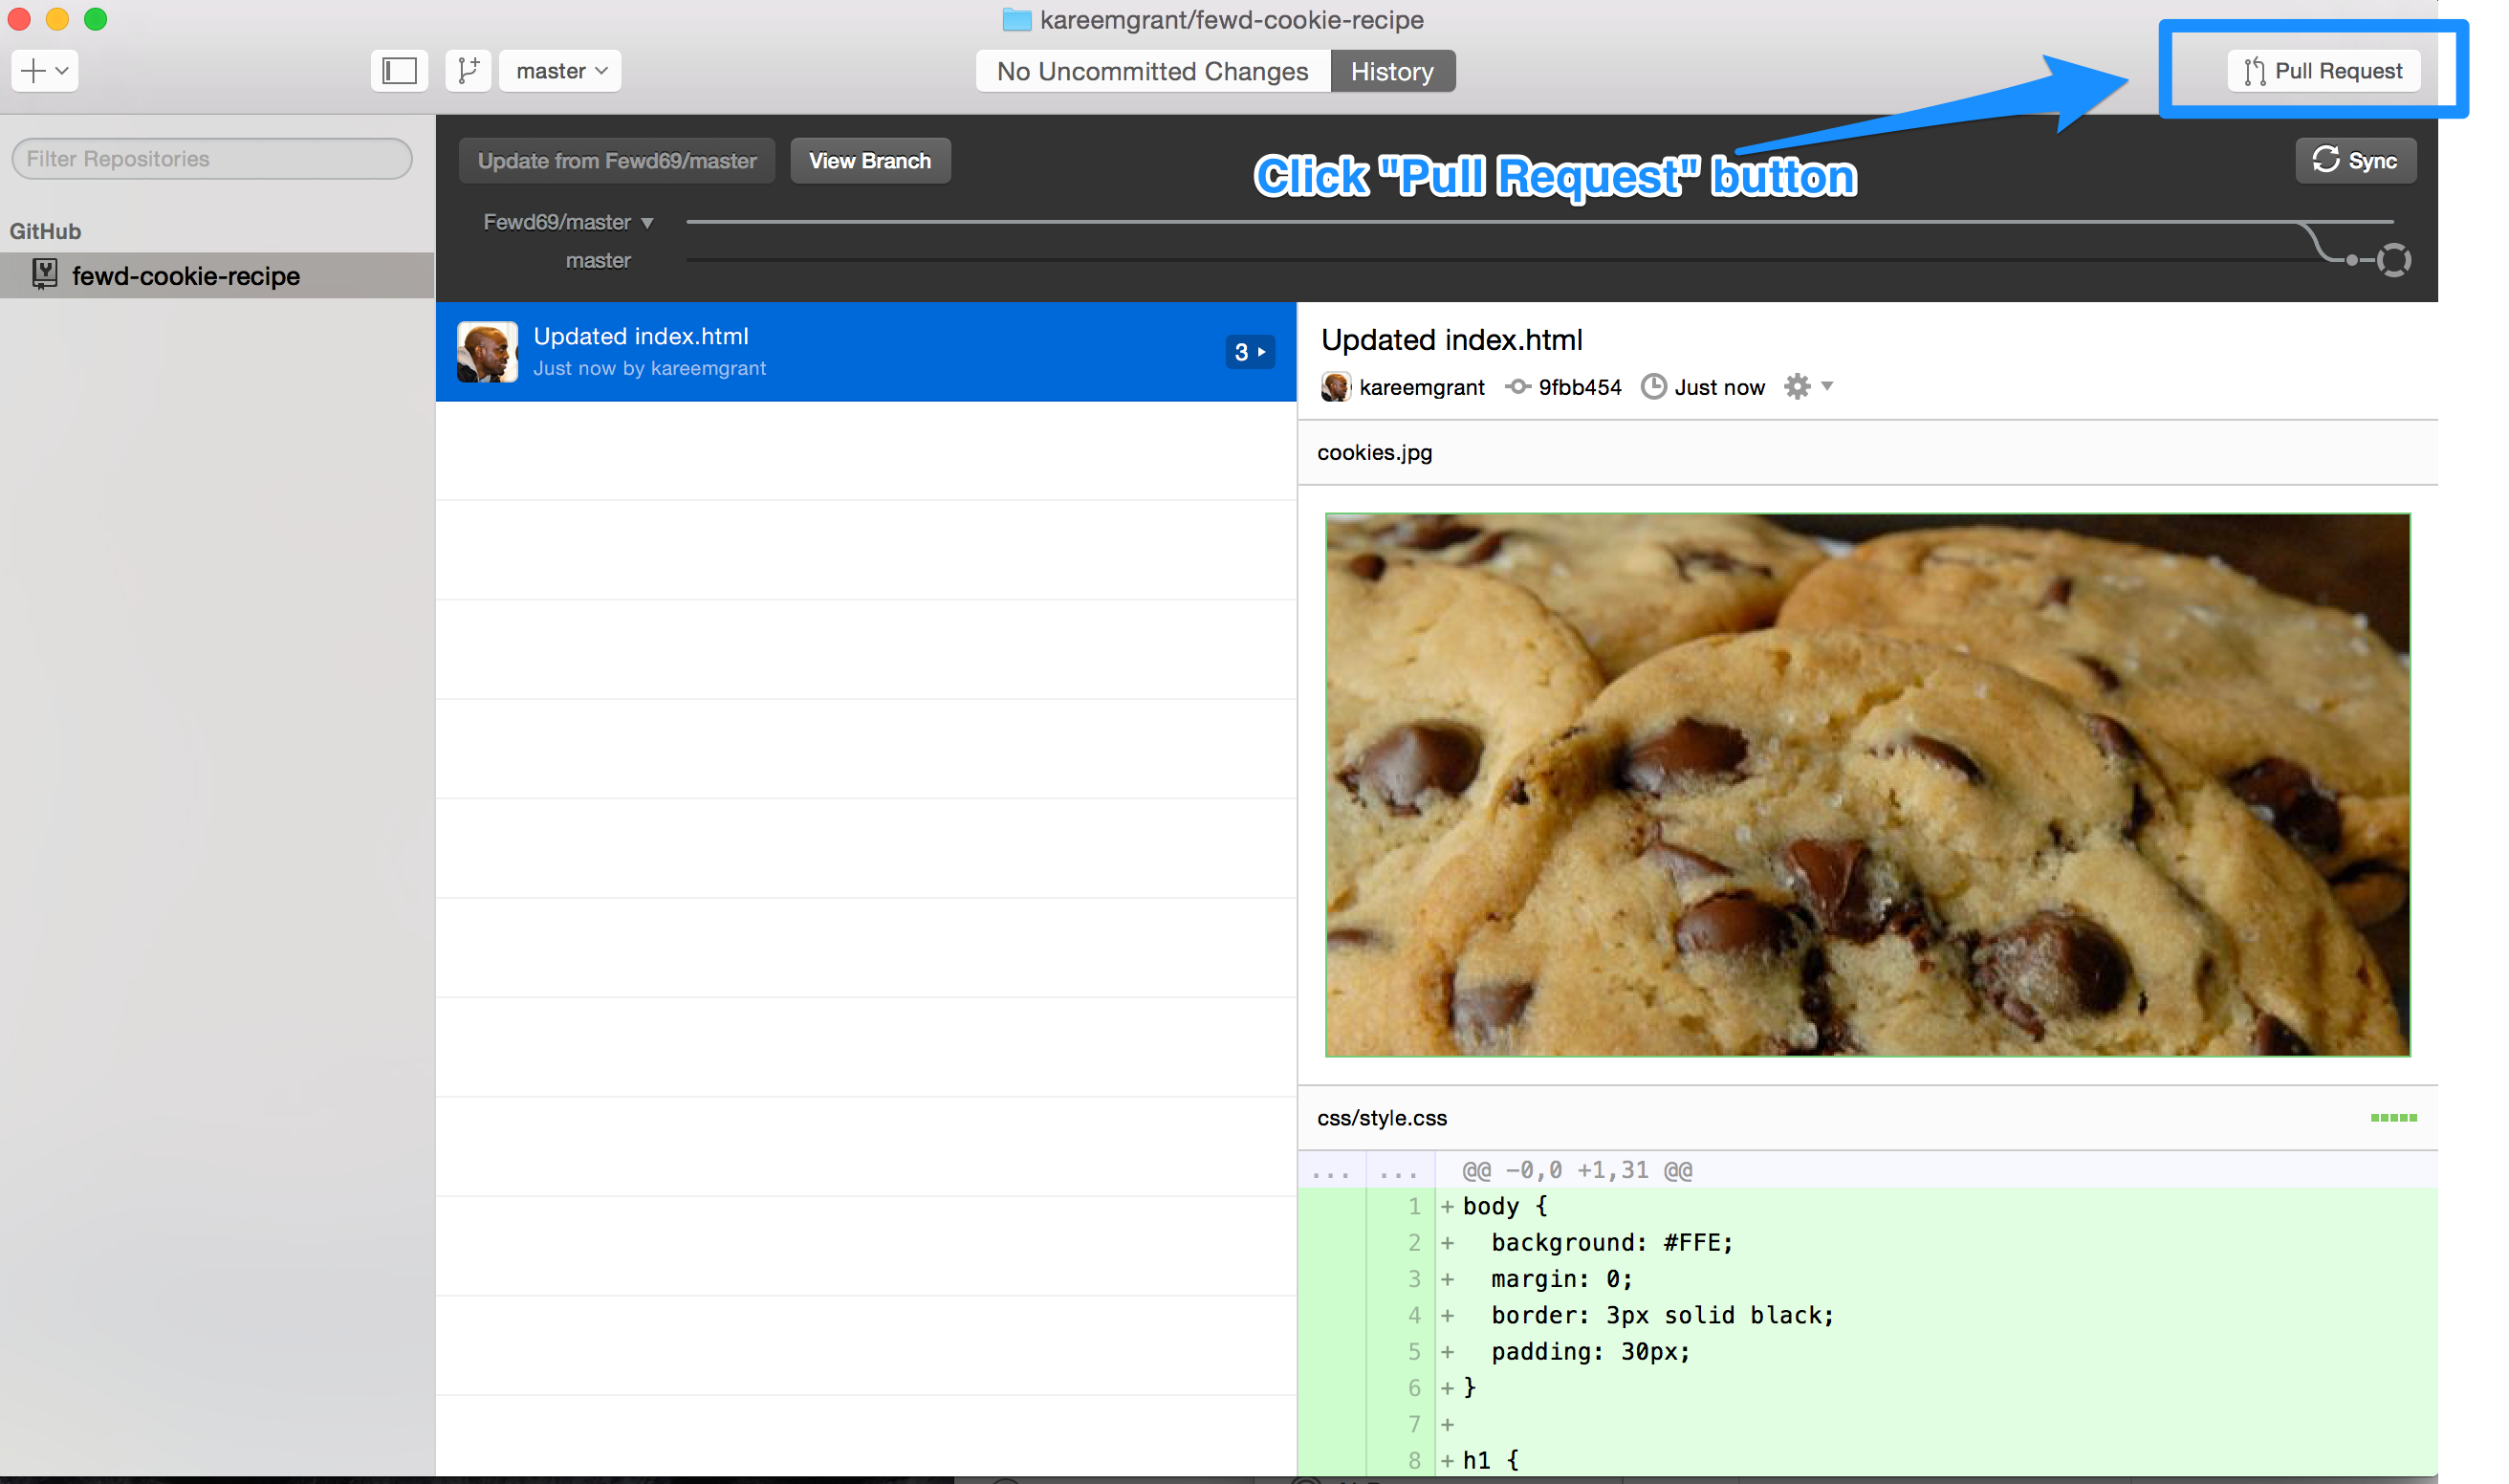
Step 13b: Create a Pull Request in Github Desktop
- Important: Pull request should be named: HW Submission from [Your Name]
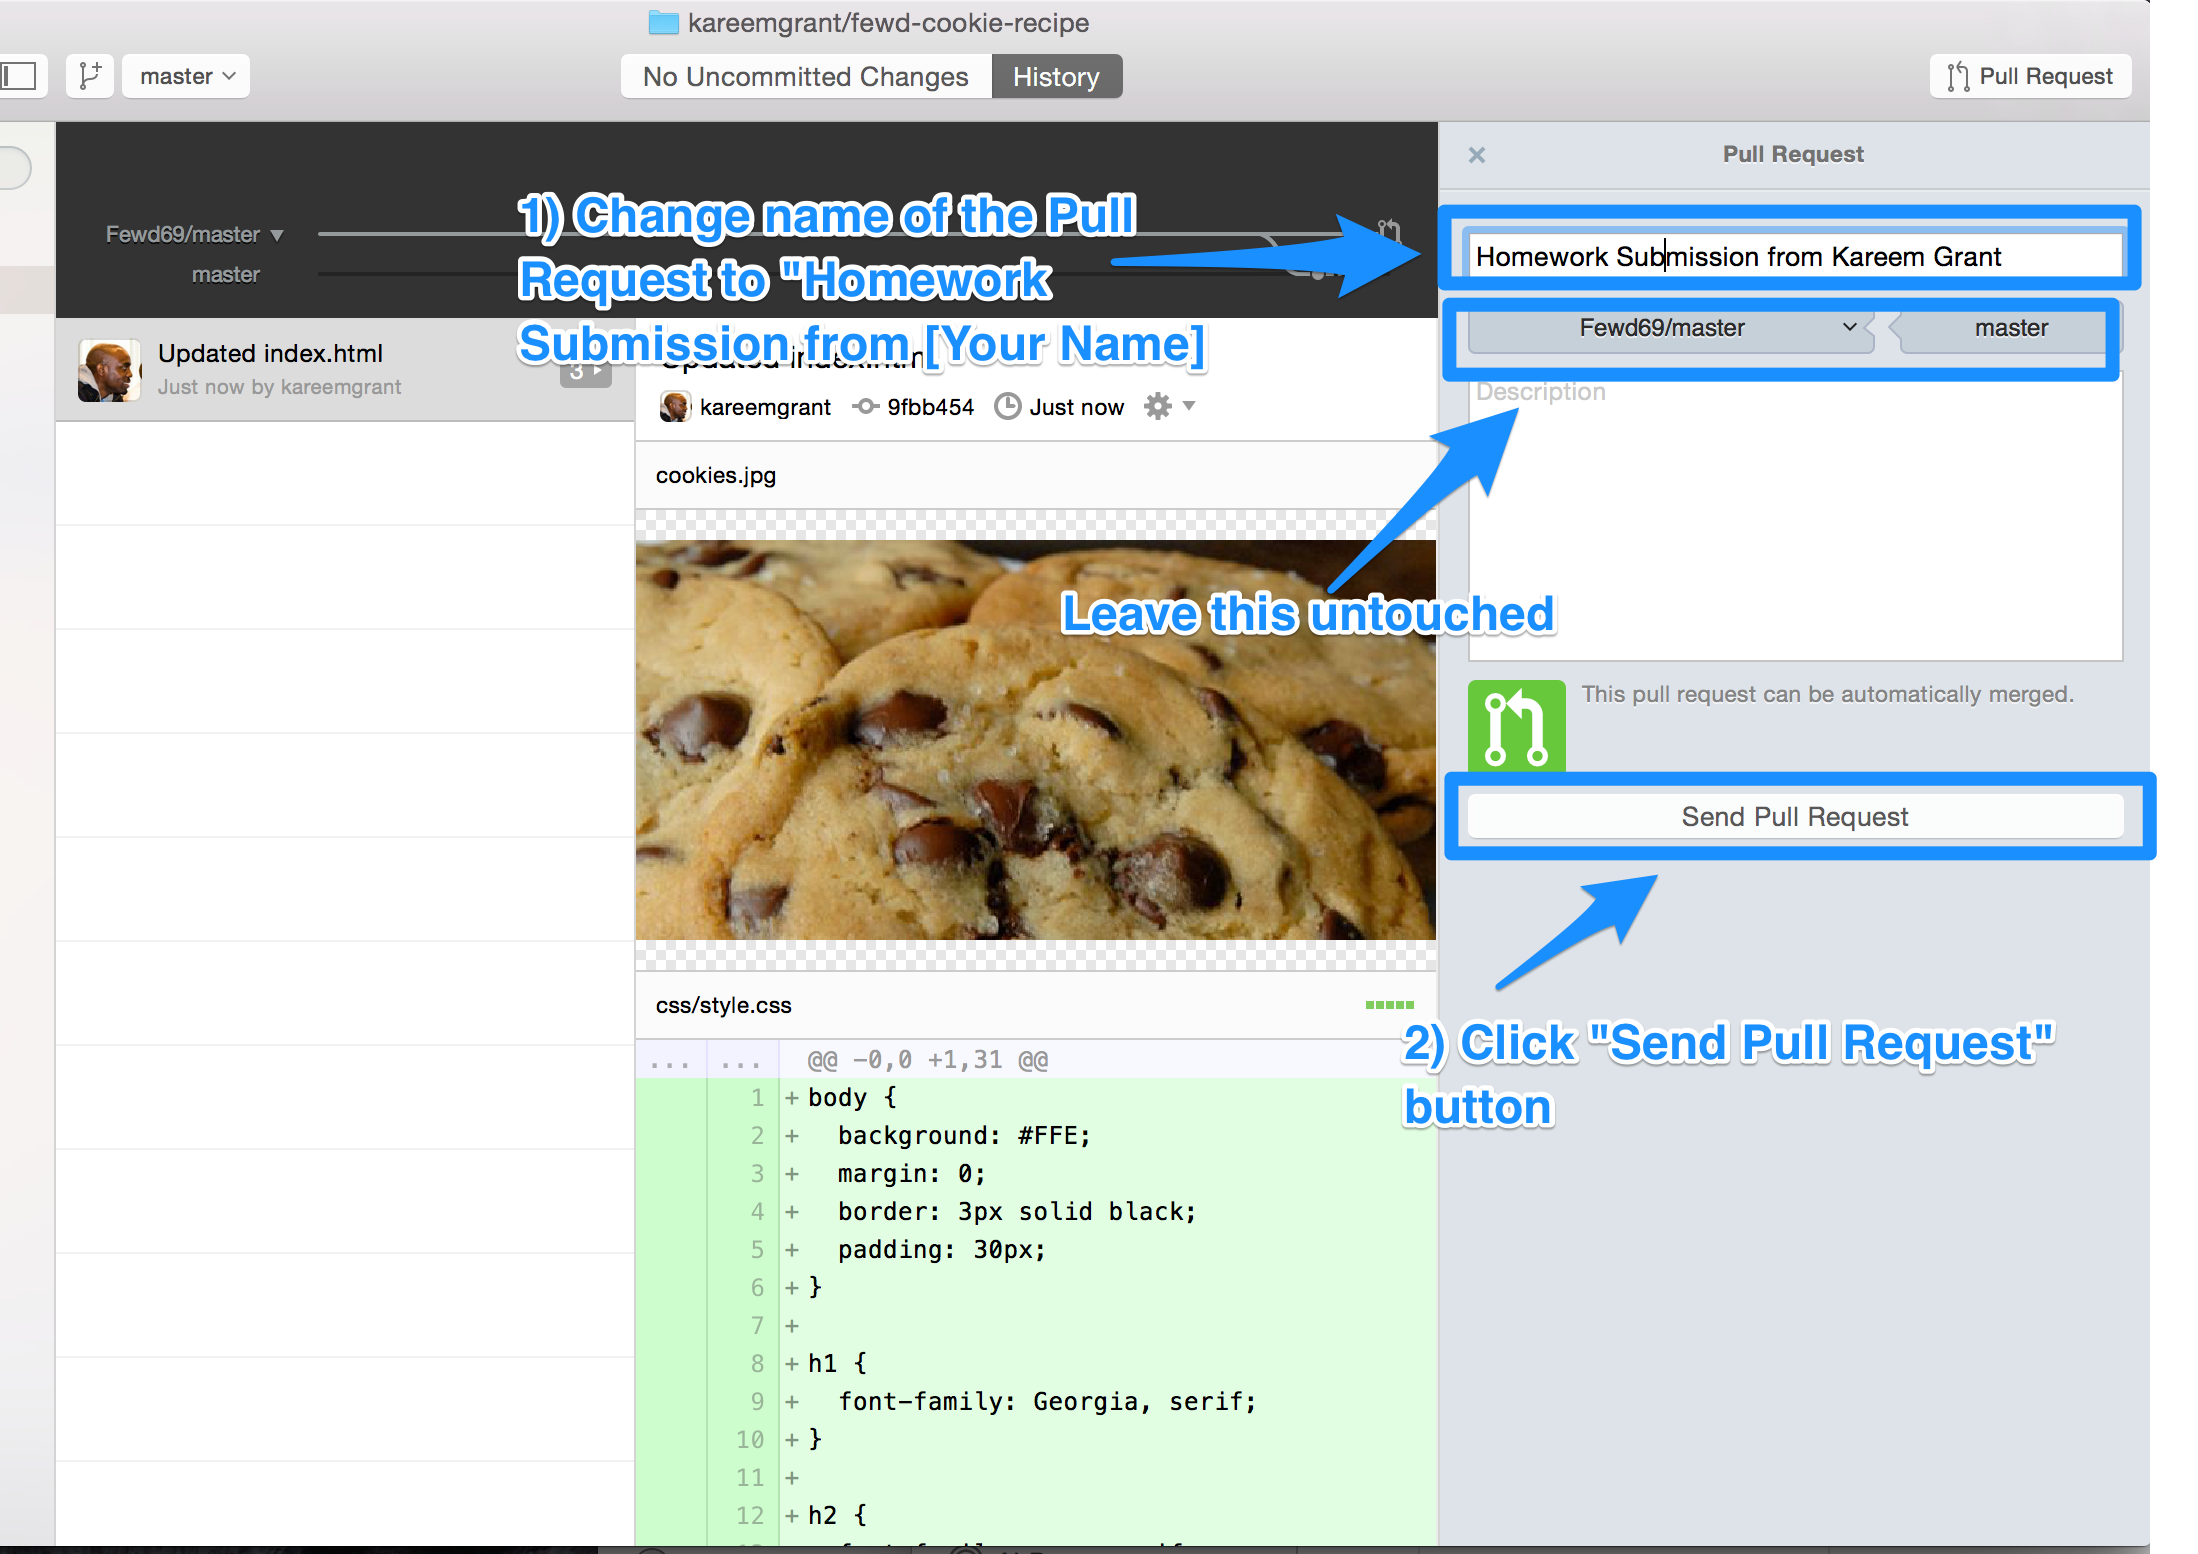
Step 13c: Create a Pull Request in Github Desktop
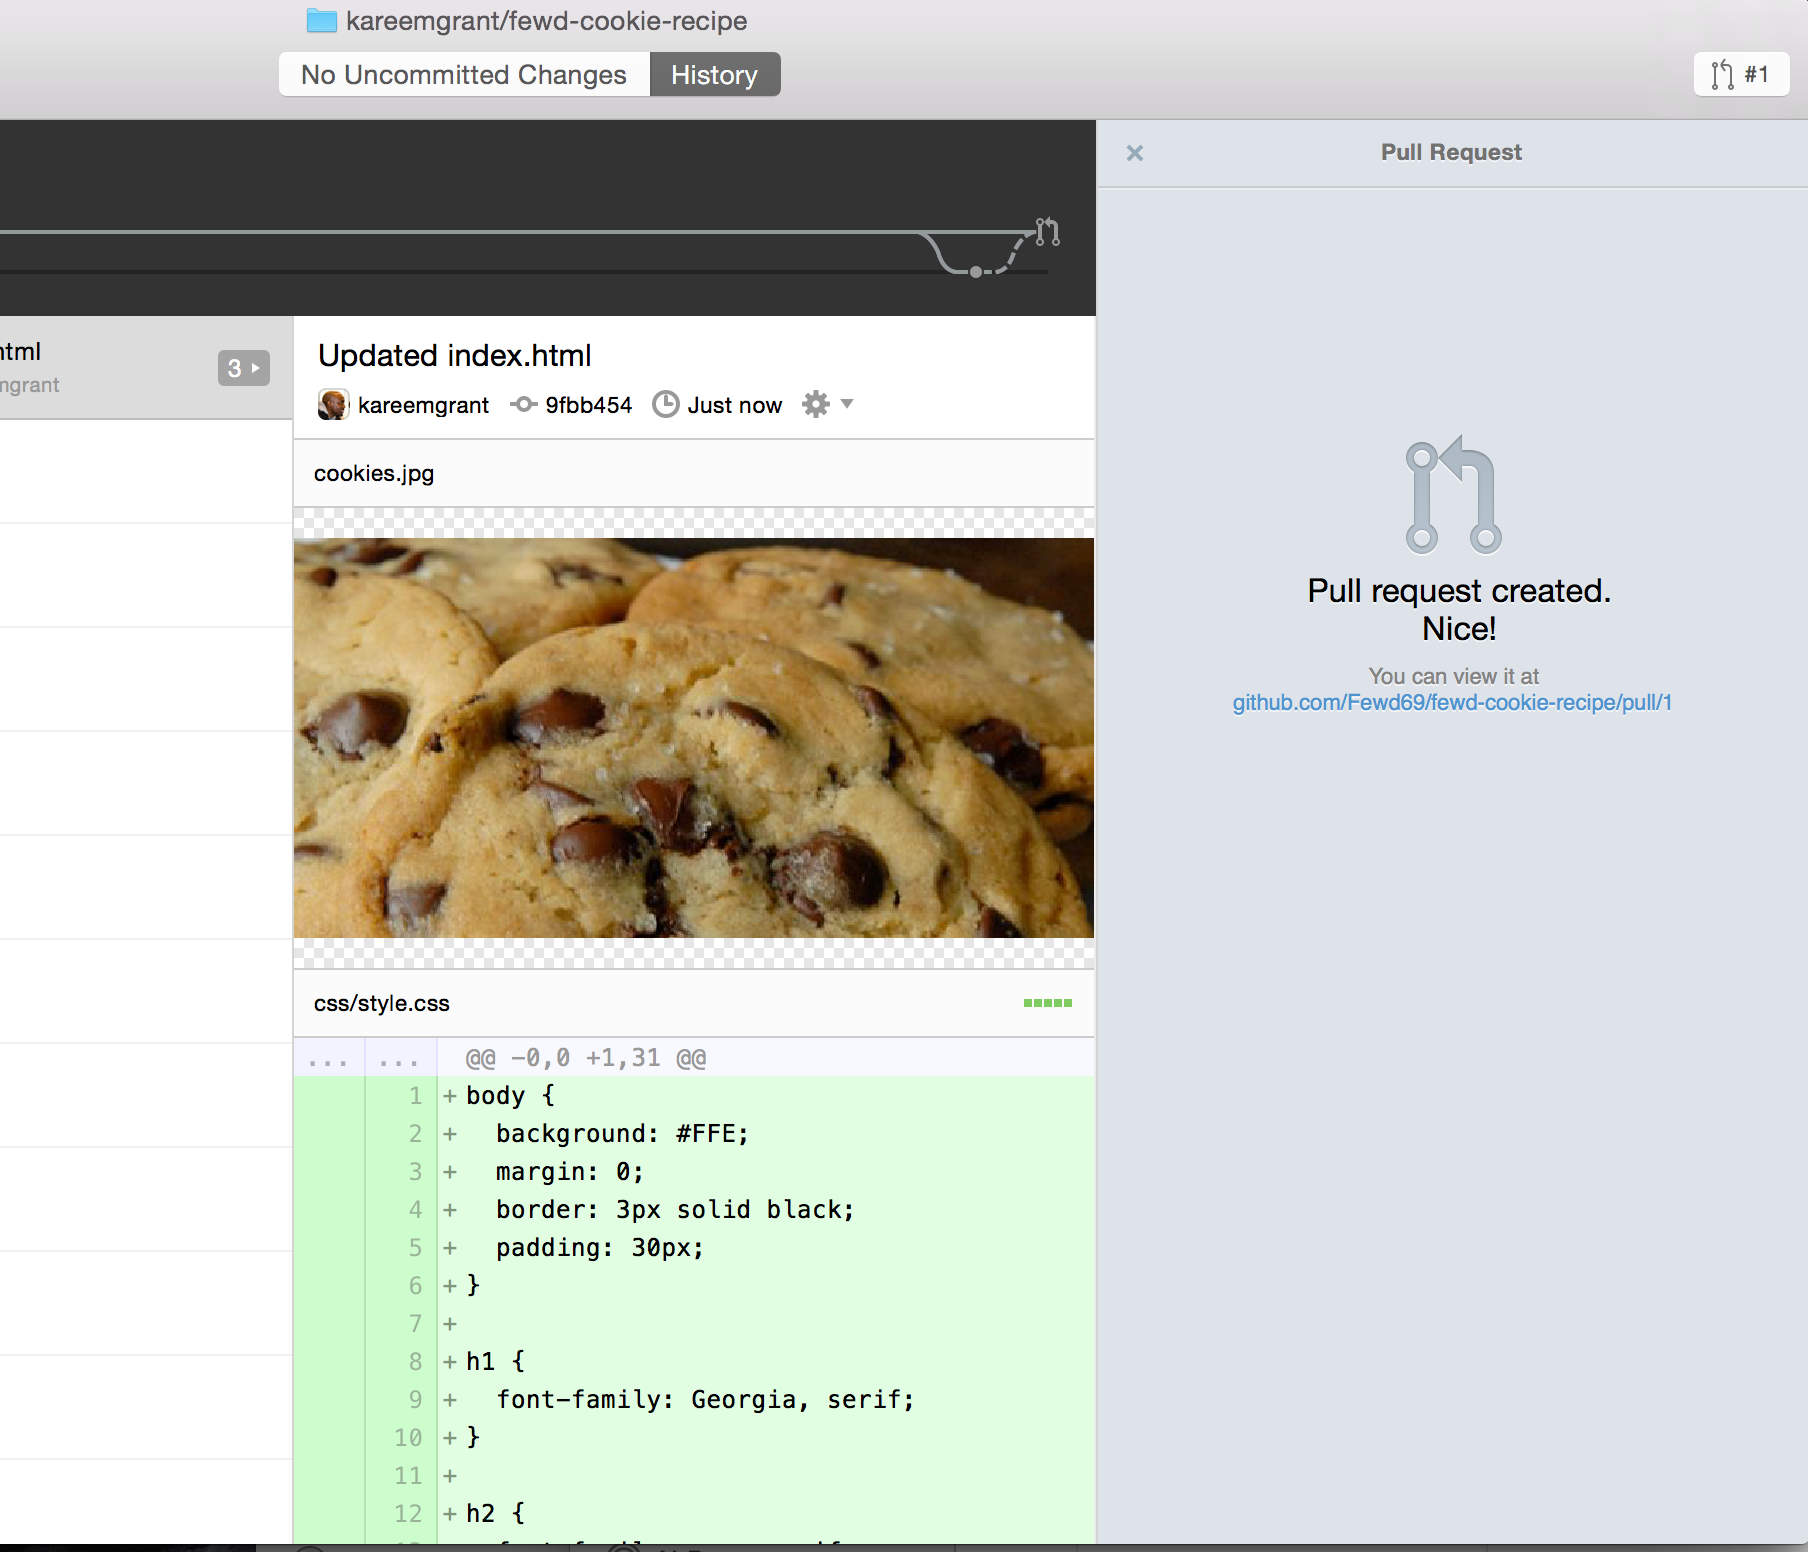
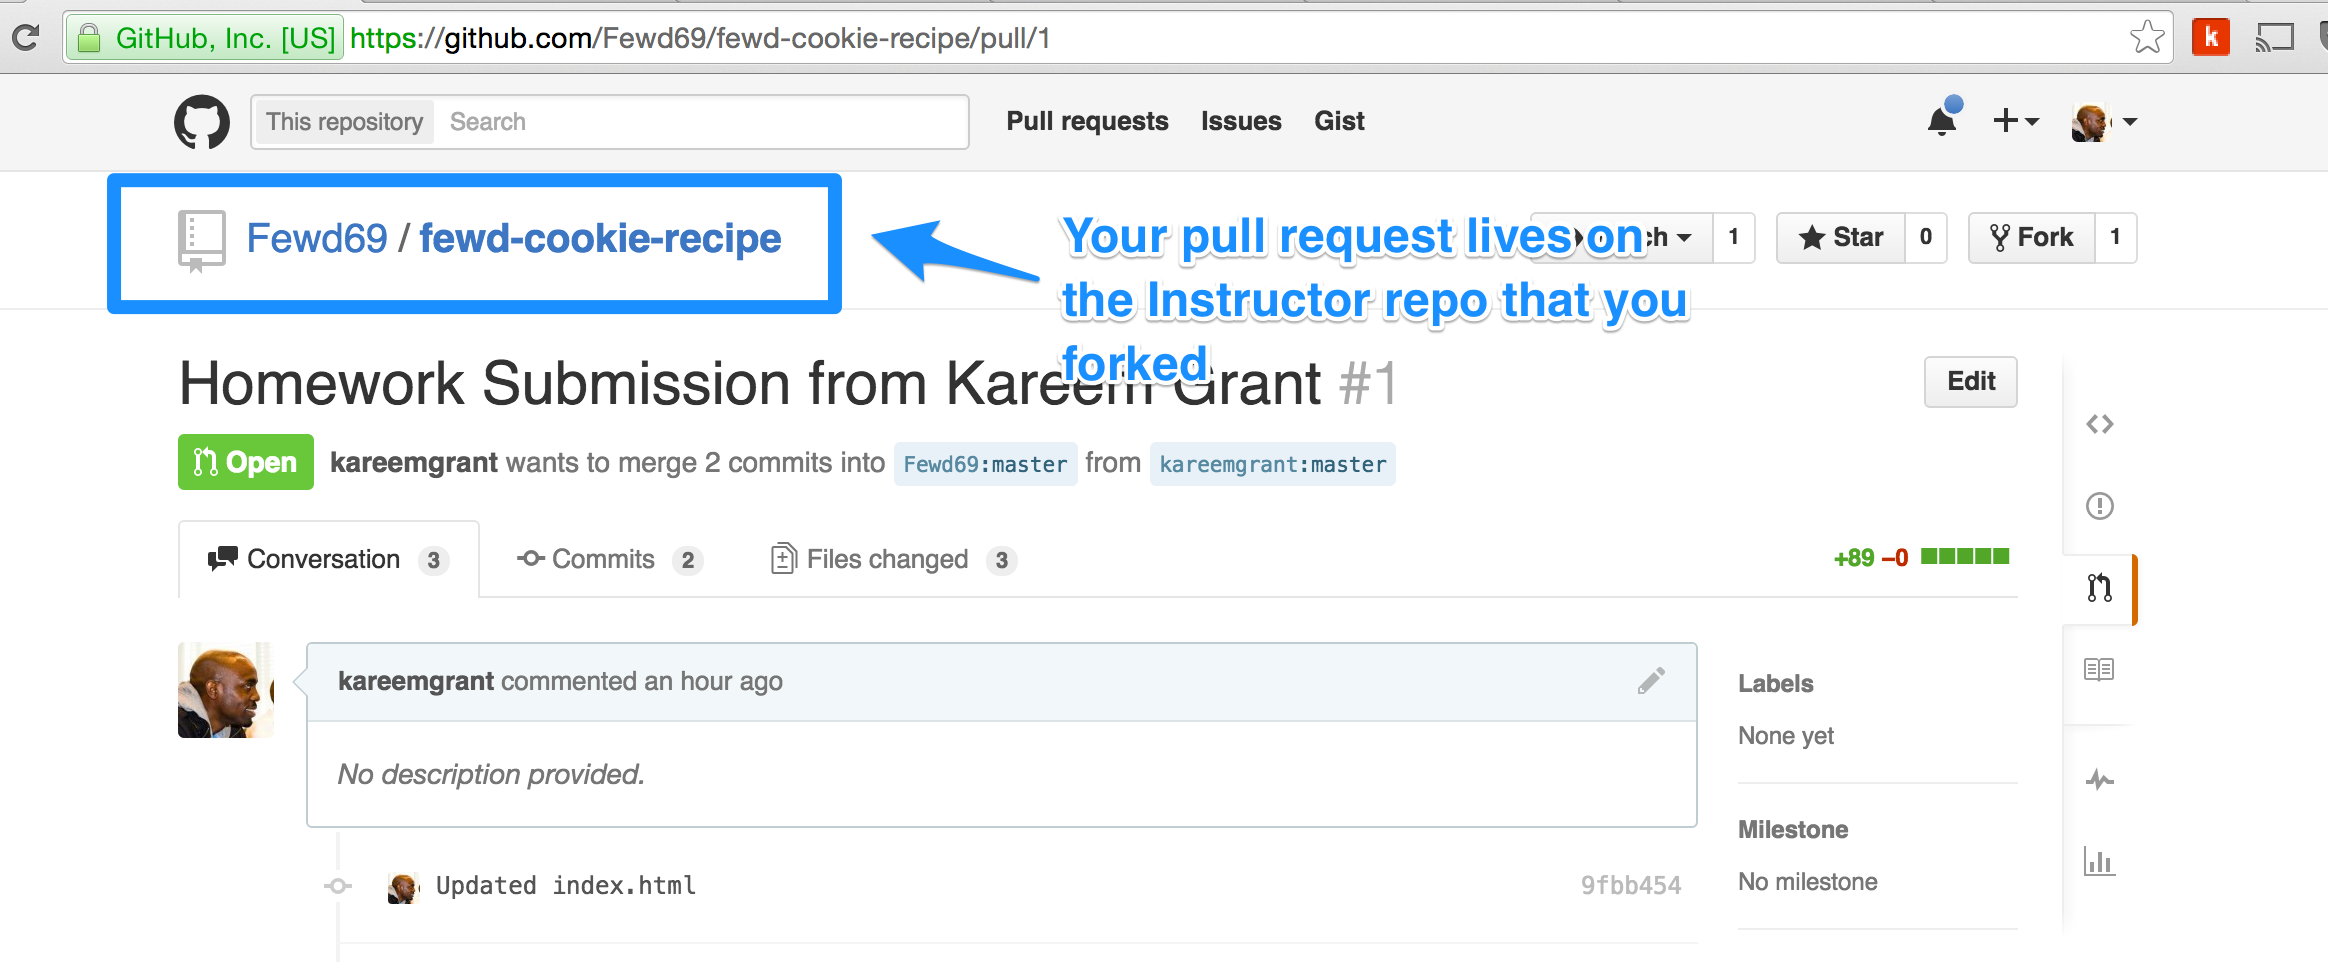
Step 14a: Confirm Creation of Pull Request on Github
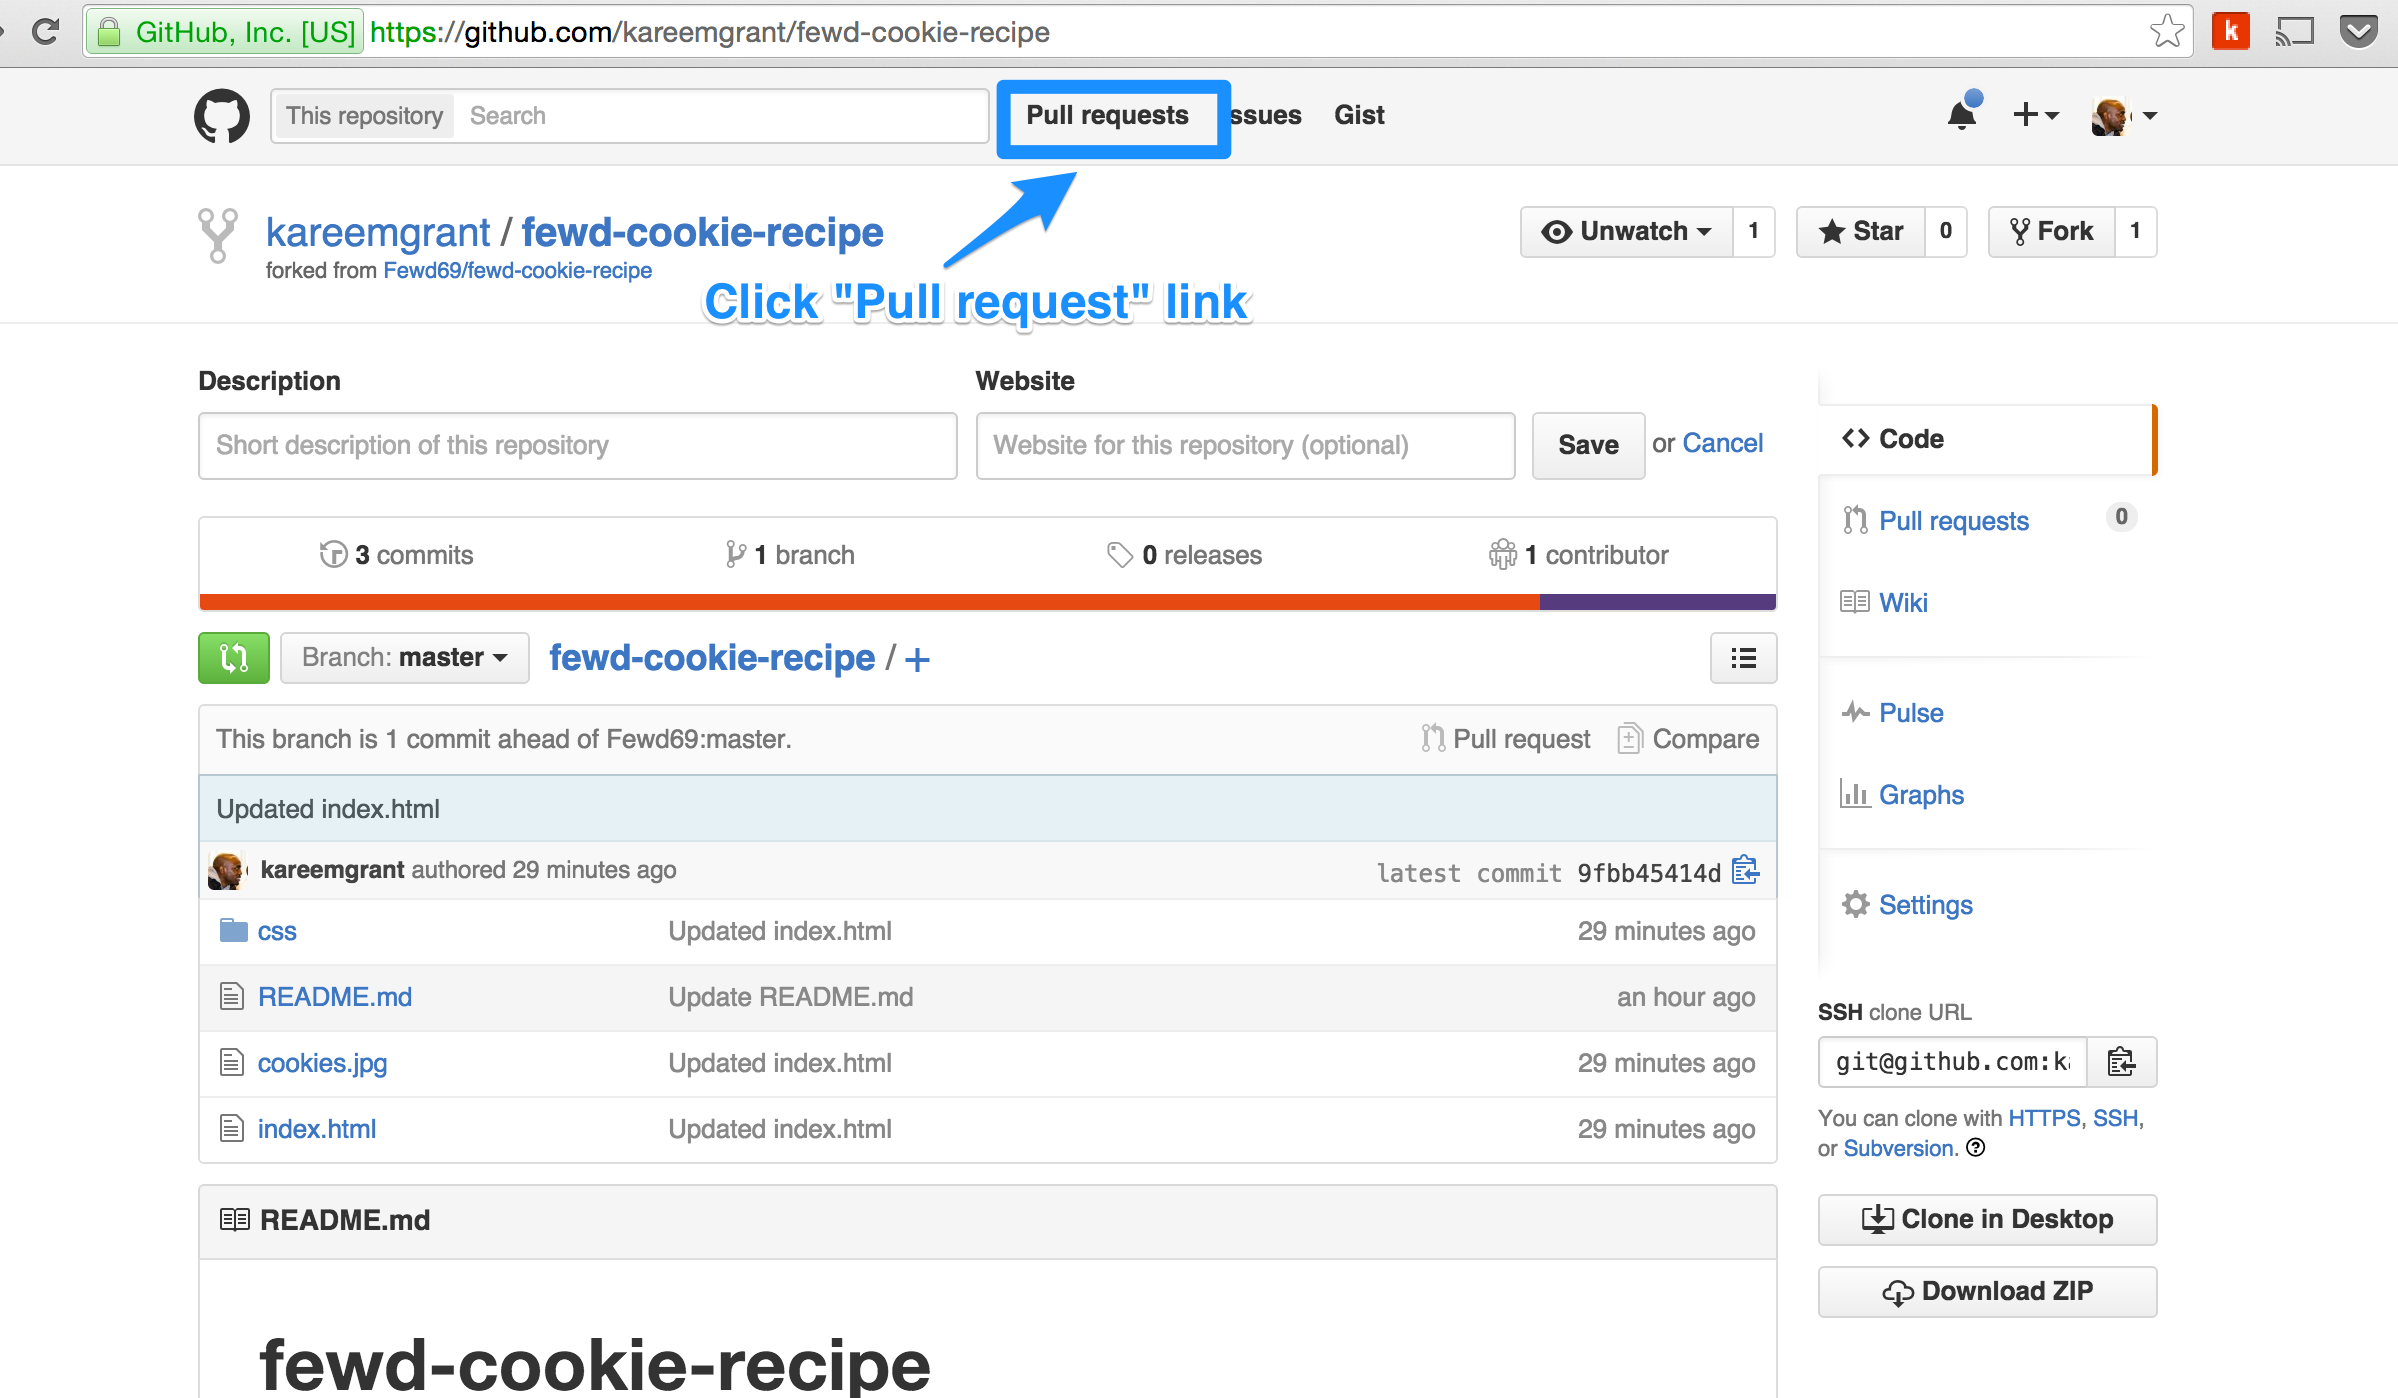
Step 14b: Confirm Creation of Pull Request on Github
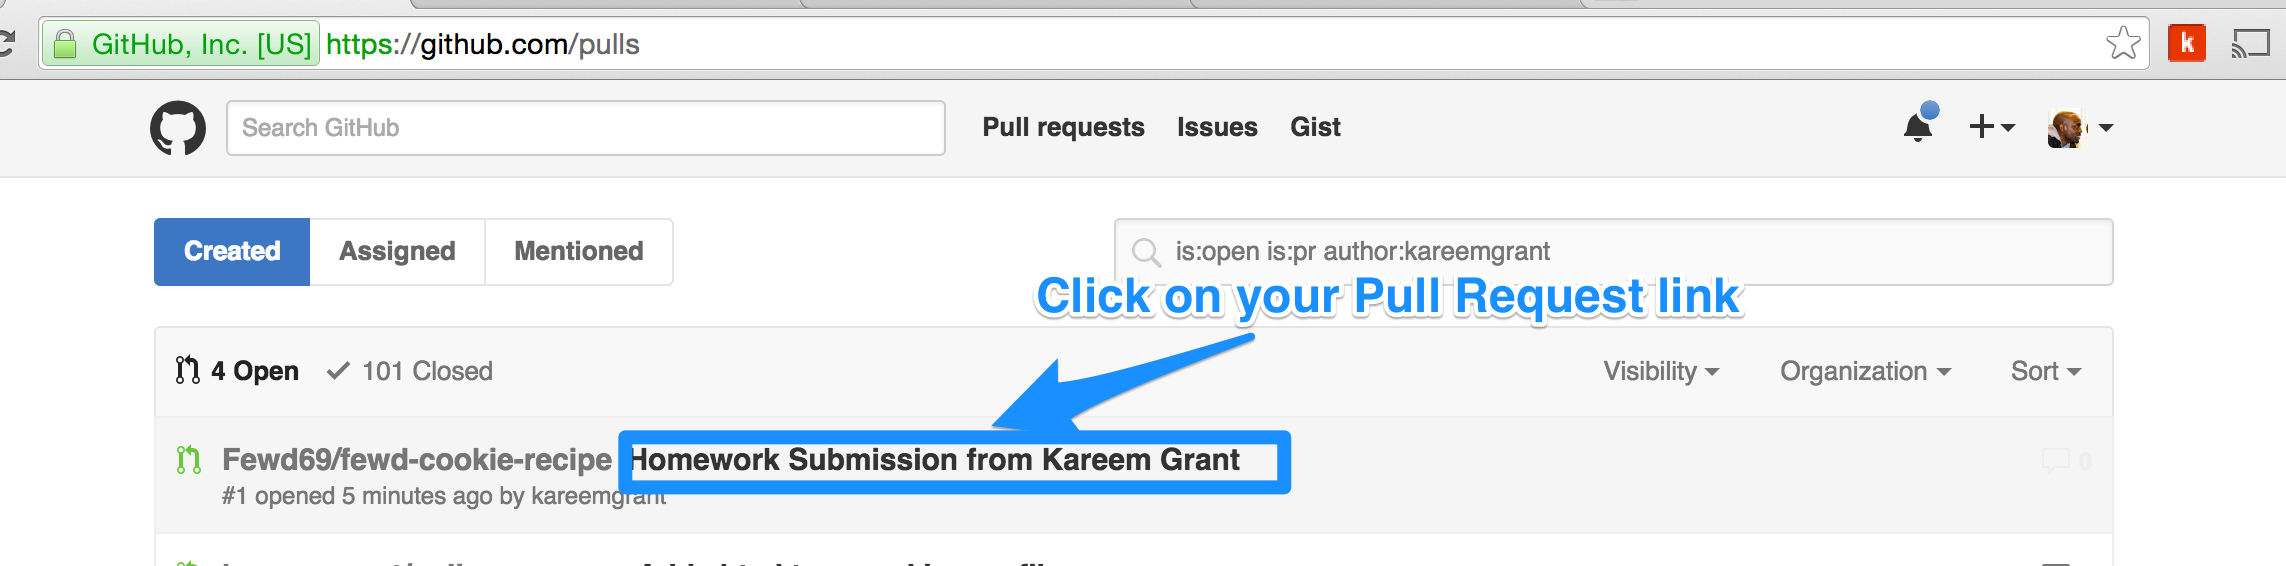
Step 14c: Confirm Creation of Pull Request on Github
Receive Feedback from Instructors
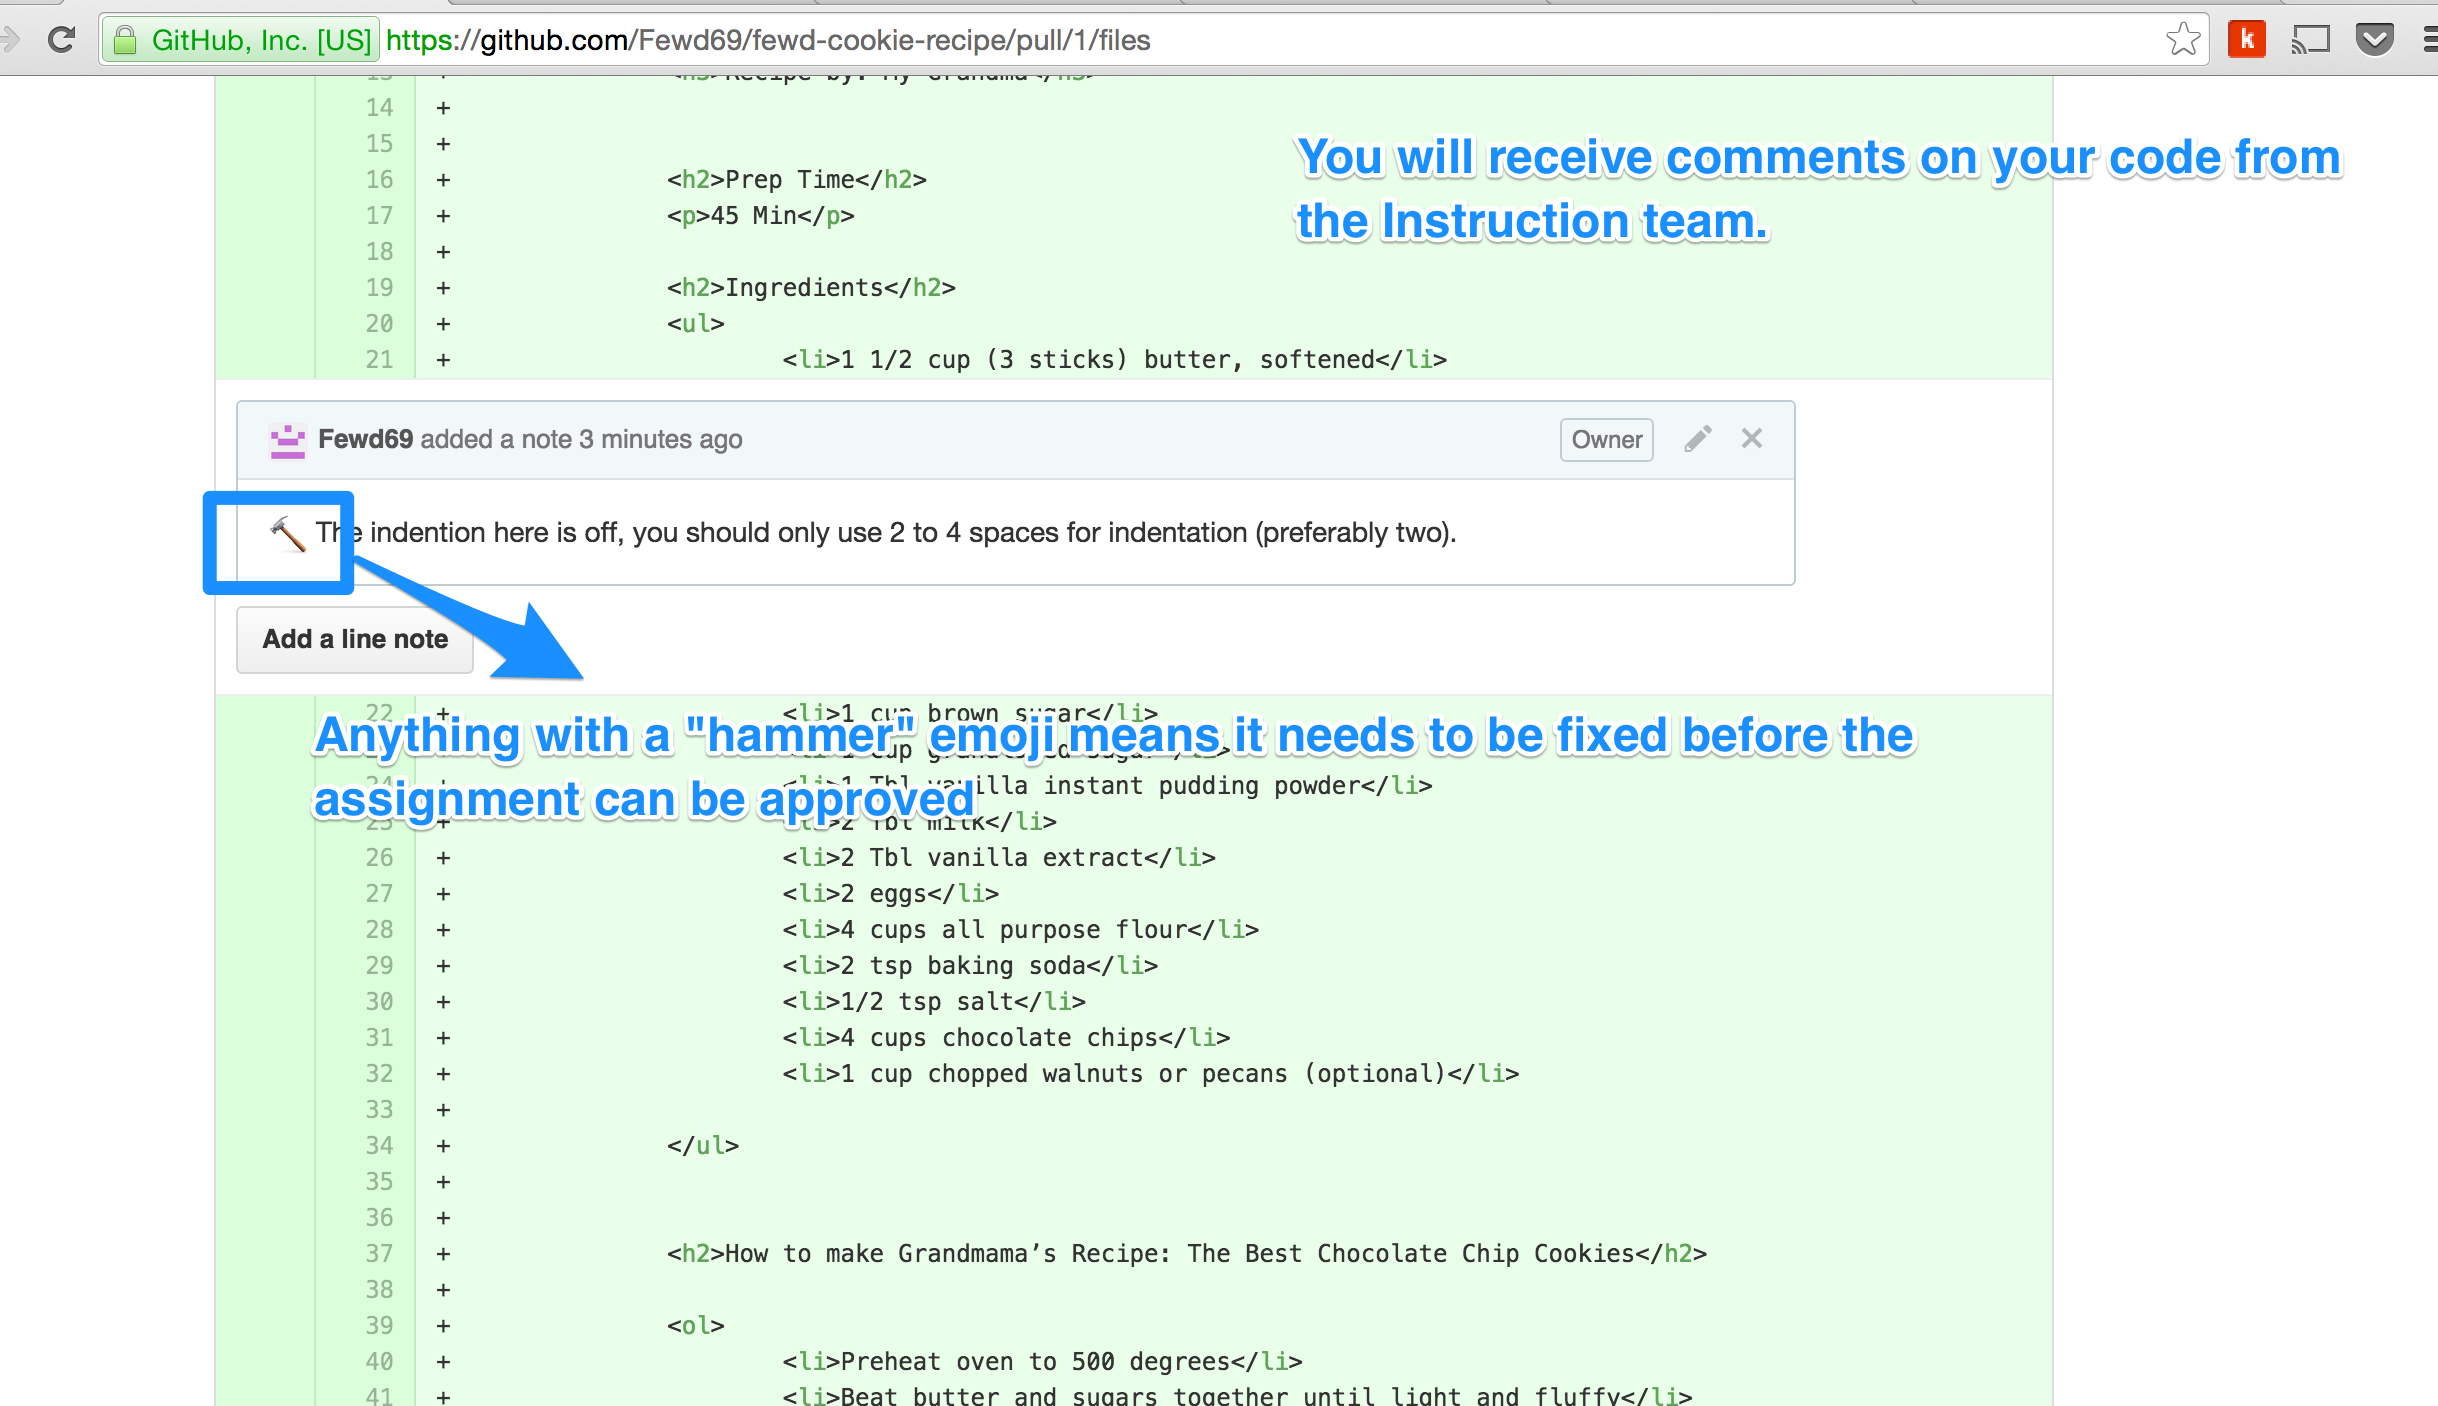
Step 15a: Instructors will leave feedback and let you know what needs to be fixed
- Hammer emojis indicate something that needs to be fixed
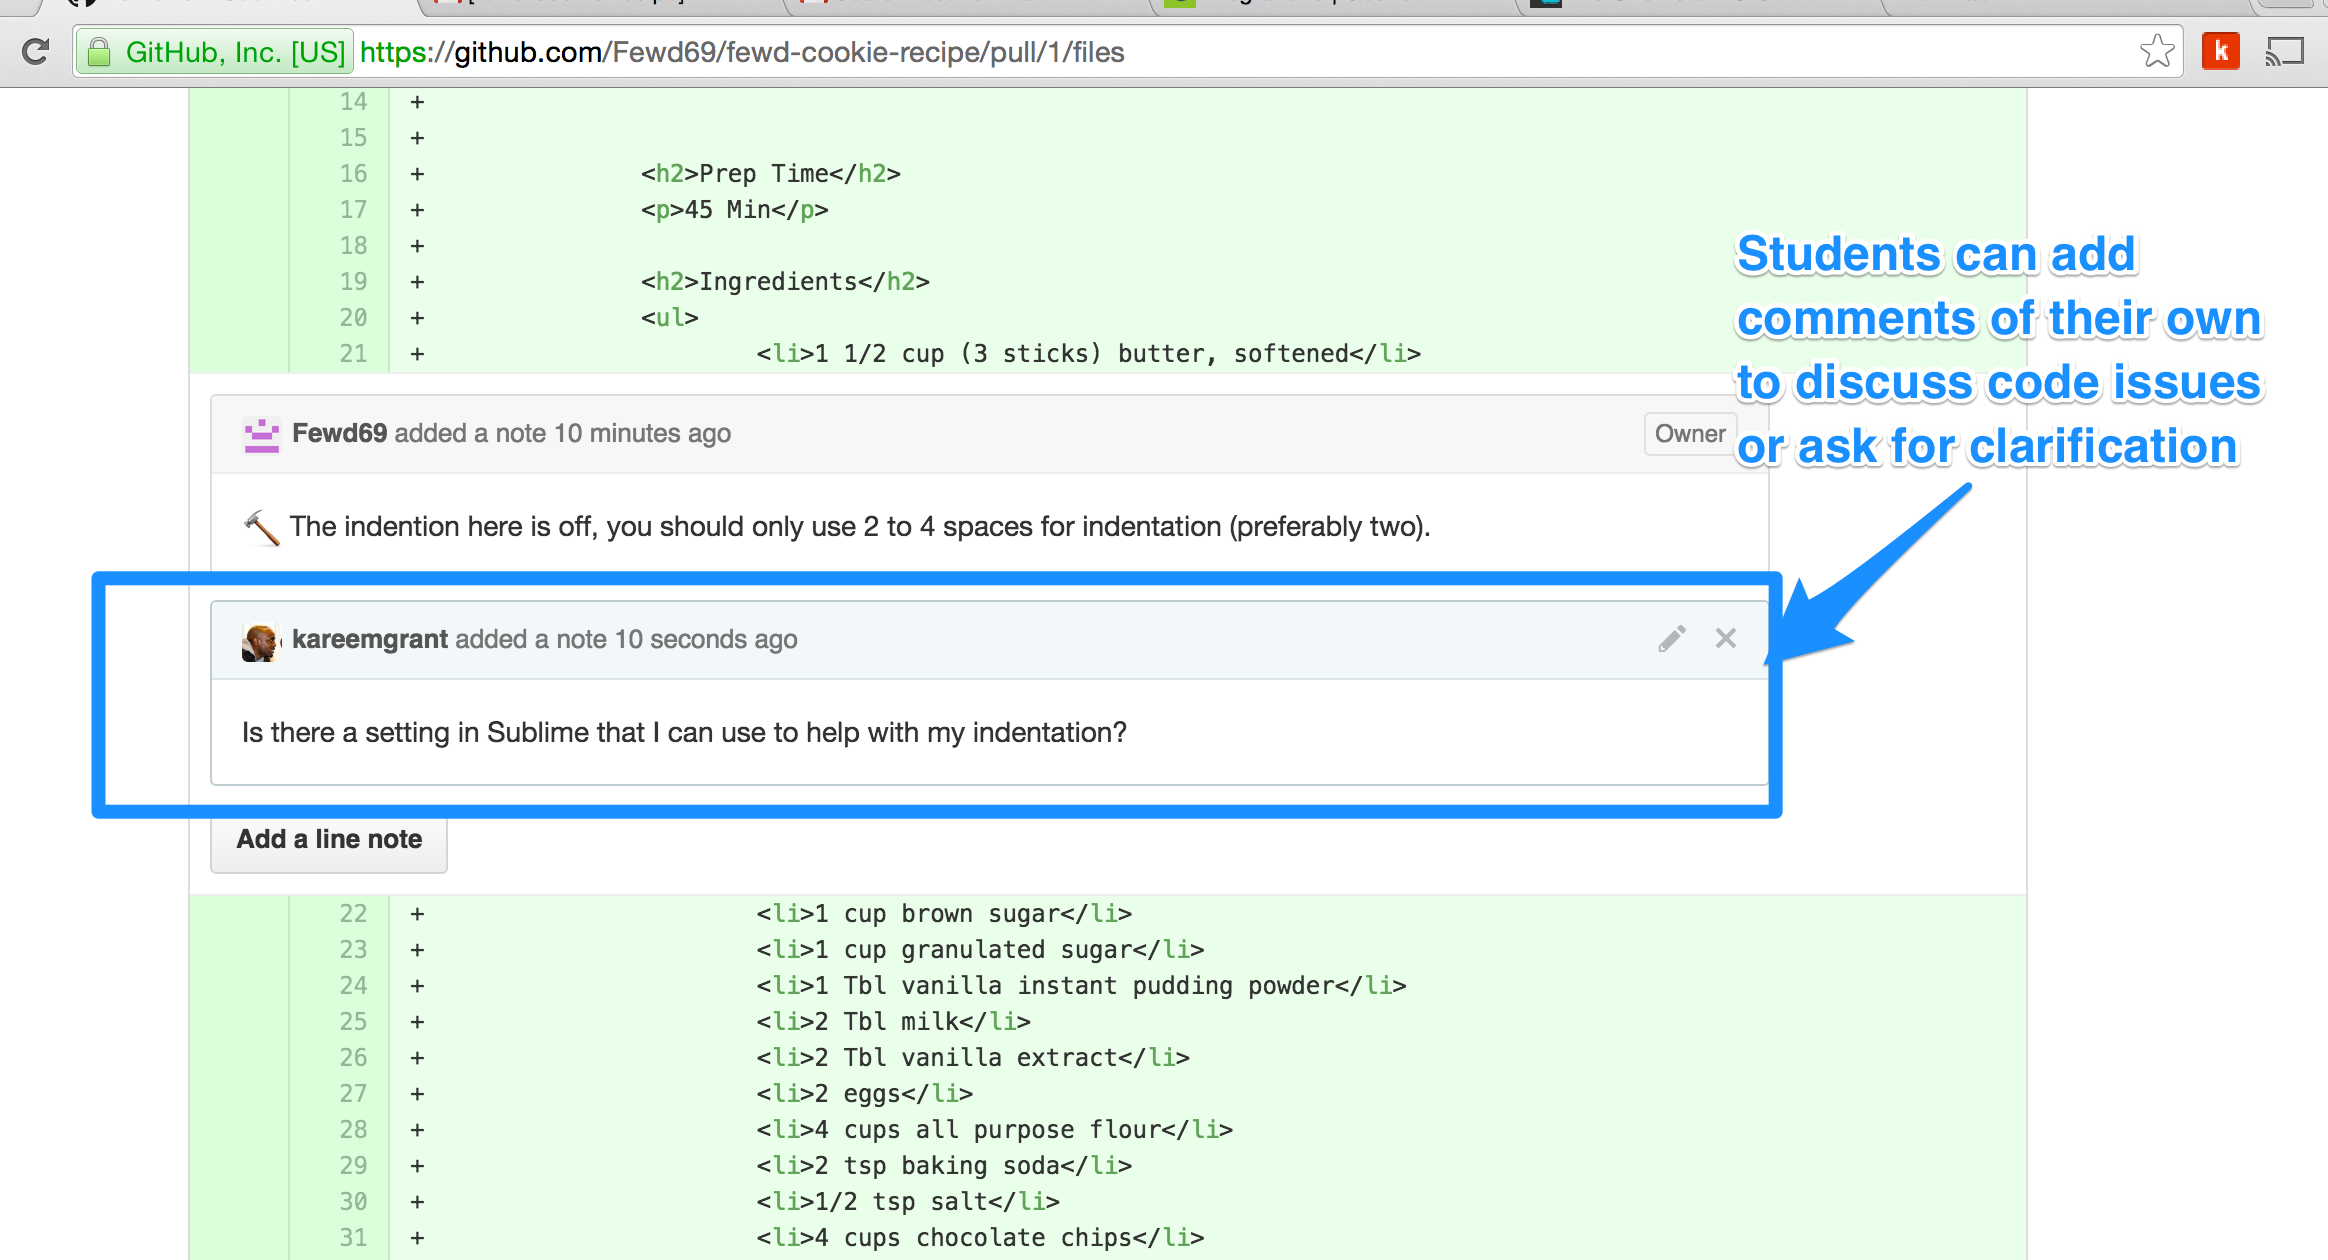
Step 15b: Students can add comments of their own to get clarification
Step 16: Student Fixes Any Outstanding Issues (Hammer emojis)
Repeat Steps 10 through 12
Make your changes in sublime
Commit your changes
Push your changes
Do Not create a new Pull Request Your existing Pull Request will automatically be updated
Step 17: Instructor Reviews Changes
- Instruction team will receive an email notification letting them know your Pull Request was updated
- Instruction team will confirm that “hammers” were addressed
Step 18: Instructor Approves Your Assignment
- Student will receive a “Thumbs Up” emoji indicating that the assignment was approved
